Recipe Card
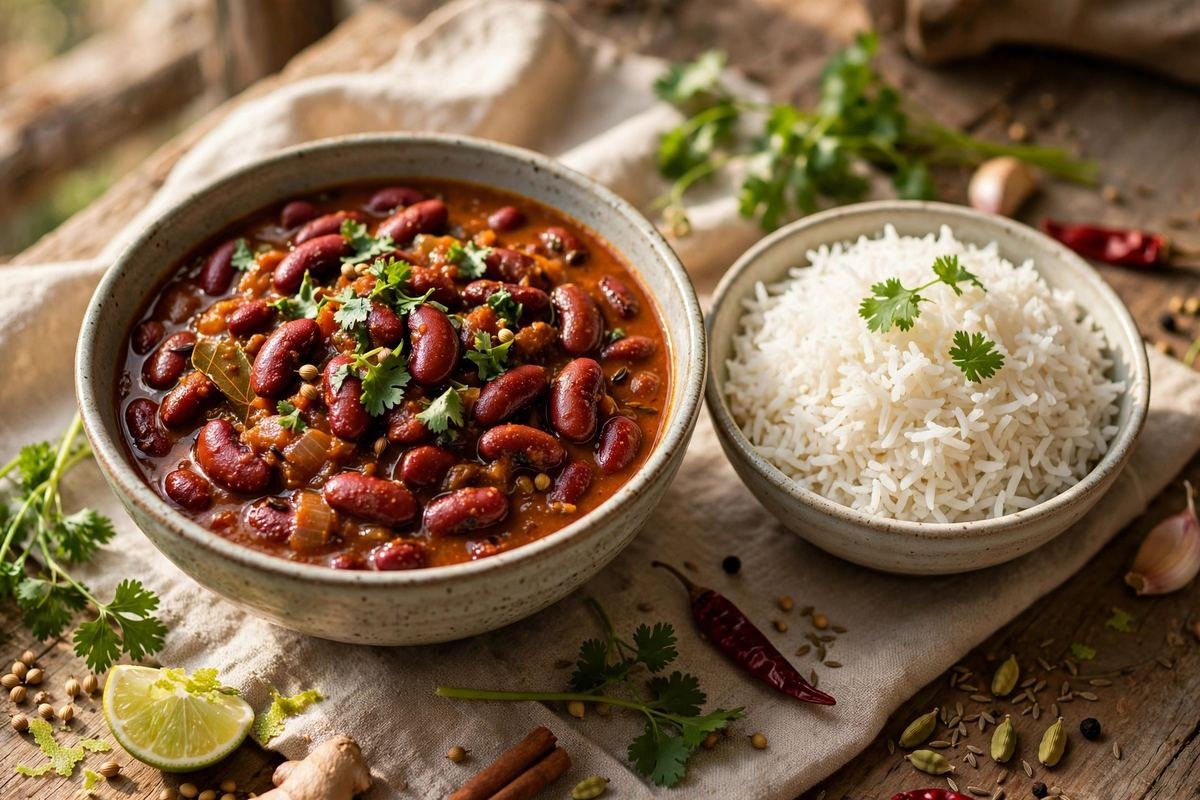
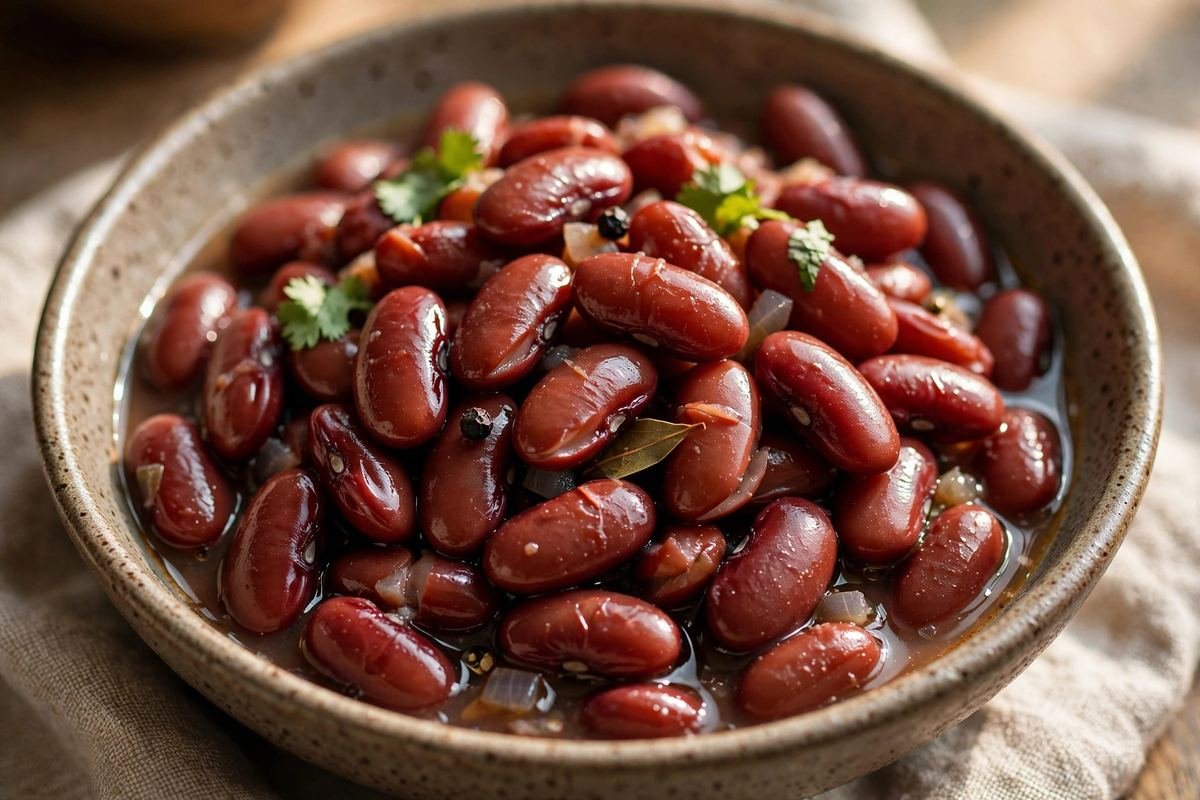
Thick, soulful rajma masala with melt-in-the-mouth kidney beans in a rich tomato gravy. The ultimate Punjabi comfort curry, best ladled over steaming basmati rice.
Ingredients
- 250g (1.25 cups) dried red kidney beans (rajma), preferably the small Jammu variety
- 3 tbsp ghee (or neutral oil)
- 1 tsp cumin seeds
- 2 bay leaves
- 3 green cardamom pods, lightly crushed
- 4 cloves
- 2.5cm (1 inch) cinnamon stick
- 2 large onions (about 250g), finely chopped
- 1 tbsp ginger-garlic paste
- 4 medium ripe tomatoes (about 400g), pureed
- 0.5 tsp turmeric powder
- 1.5 tsp Kashmiri red chilli powder
- 2 tsp coriander powder
- 1 tsp garam masala, plus extra to finish
- 1 tsp kasuri methi (dried fenugreek leaves)
- 1.5 tsp salt, or to taste
- 750ml (3 cups) water, plus more as needed
- 3 tbsp chopped fresh coriander leaves
- 1 tbsp fresh cream — optional, for serving
- Lemon wedges and sliced onions, to serve
Instructions
- Soak the rajma overnight: Rinse the beans well, then soak in a large bowl with at least three times their volume of water for 8 to 10 hours or overnight. The beans should look plump and nearly double in size. Drain and rinse again — never cook beans in their soaking water, which contains the compounds that cause digestive discomfort.
- Pressure-cook until creamy: Transfer the drained beans to a pressure cooker with 750ml of fresh water and 1 teaspoon of salt. Cook on high heat until the first whistle, then reduce to medium-low and cook for 5 to 6 whistles more, about 20 to 25 minutes total. Let the pressure release naturally. Test a bean by pressing it between your fingers — it should mash completely with no chalky centre. If using a regular pot, simmer covered for 60 to 90 minutes, topping up water as needed. Reserve the cooking liquid; it is liquid gold for the gravy.
- Bloom the whole spices: Heat the ghee in a heavy kadhai over medium heat until it shimmers. Add the cumin seeds, bay leaves, cardamom, cloves, and cinnamon, and fry for 30 to 40 seconds until the cumin darkens a shade and the air smells intensely aromatic. Do not let them burn — bitter spices will haunt the entire pot.
- Brown the onions deeply: Add the chopped onions with a pinch of salt and cook, stirring regularly, for 10 to 12 minutes until they turn deep golden-amber. This is not a step to rush: pale onions give a pale, raw-tasting gravy, while well-browned onions build sweetness and that characteristic dark colour. Add the ginger-garlic paste and fry for 2 minutes more until the raw smell disappears.
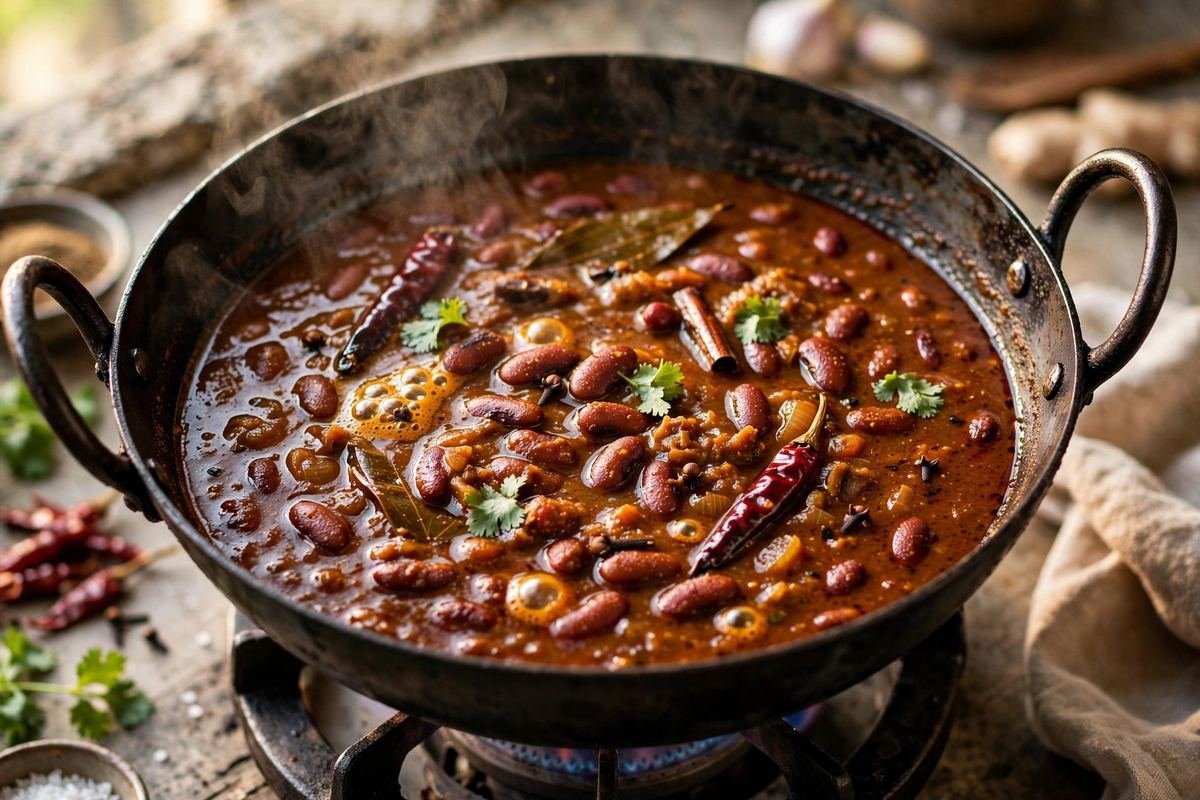
- Bhunao the tomato masala: Pour in the tomato puree along with the turmeric, Kashmiri chilli powder, and coriander powder. Cook over medium heat, stirring often, for 12 to 15 minutes. The masala will go through stages — first watery and bright red, then thickening and darkening. It is done when it turns a deep reddish-brown, looks glossy, and you see glistening oil separating at the edges of the pan. This bhunao stage is the entire secret of the recipe.
- Combine beans and masala: Tip the cooked rajma into the kadhai along with all of its cooking liquid. Add another 250ml of hot water if you like a looser gravy — remember the curry thickens as it sits. Stir well, crushing a ladleful of beans against the side of the pot to release their starch. This natural thickening is what gives rajma its signature clingy texture.
- Simmer low and slow: Bring to a gentle boil, then reduce the heat to low, partially cover, and simmer for 20 to 25 minutes, stirring occasionally. The gravy should thicken to coat the back of a spoon, and the beans should absorb the masala’s flavour — taste one; it should taste seasoned through, not bland inside. If the curry gets too thick, add hot water a little at a time.
- Finish like a dhaba: Crush the kasuri methi between your palms and stir it in along with the garam masala. Simmer 5 minutes more, then taste and adjust salt and chilli. Rest the curry off the heat for at least 15 minutes — this resting time marries the flavours in a way no amount of extra cooking can. Garnish with fresh coriander and a swirl of cream if you like, and serve hot.
Tip: Read through the full post below for step-by-step photos, pro tips, variations and FAQs before you start cooking.
The Story Behind Rajma Masala
Ask any Punjabi what Sunday lunch looks like, and the answer comes back before you finish the question: rajma-chawal. A mountain of steaming basmati rice, a ladleful of thick, dark kidney bean curry poured right over the top, a dollop of ghee melting into it all, and sliced onions with lemon on the side. It is not just a meal; it is a ritual — the kind of food that tastes like home even when you are a thousand kilometres from it.
Rajma itself is a traveller with a remarkable passport. The kidney bean is native to Mexico and Central America, and it sailed to India with the Portuguese in the 16th and 17th centuries, along with the tomato, the potato, and the chilli. North India adopted it wholeheartedly, and nowhere more so than in Jammu, whose small, thin-skinned red rajma is still considered the gold standard — so prized that “Jammu rajma” commands a premium in markets across the country. Over generations, Punjabi home cooks transformed this foreign bean into something unmistakably desi: simmered low and slow in a masala of onion, tomato, ginger, and ghee until the beans turn creamy and the gravy thick enough to coat every grain of rice.
This recipe is my family’s version — the one that has ended up on our table every other Sunday for as long as I can remember. It is a dhaba-style rajma, meaning the gravy is robust and deeply flavoured rather than delicate: the masala is fried patiently until the oil separates, a handful of beans are mashed back into the pot for natural thickness, and the whole thing finishes with garam masala and kasuri methi. There are no shortcuts worth taking here except the pressure cooker, which is less a shortcut than a necessity. Follow this method and you will get rajma with beans so soft they yield at the touch of a spoon, in a gravy you will want to mop up with your fingers.
Why You’ll Love This Recipe
- Melt-in-the-mouth beans, every time — the soaking and pressure-cooking method guarantees creamy rajma with zero hard centres.
- Thick, clingy gravy — mashing a portion of the beans gives body without any cream or flour.
- Deep dhaba flavour — patient bhunao of the masala builds the dark, rich base this curry is famous for.
- One-pot friendly — after the beans cook, everything happens in a single kadhai.
- Protein-packed vegetarian comfort — around 15 grams of protein per serving, endlessly satisfying.
- Tastes even better the next day — the ultimate make-ahead curry for meal prep and lunchboxes.
- Pantry staples only — no exotic ingredients, just good technique.
Key Ingredients Explained
Everything starts with the rajma itself — 250g (about 1.25 cups) of dried red kidney beans. If you can find the small Jammu variety, with its thin skin and sweet, creamy interior, use it; it cooks faster and tastes noticeably better. Regular dark red kidney beans work fine too, but avoid very old beans from the back of the pantry — they can stay stubbornly firm no matter how long you cook them. Soak the beans for 8 to 10 hours or overnight in plenty of water with a pinch of baking soda if your water is hard; properly soaked beans nearly double in size and cook in half the time.
The gravy is built on the classic Punjabi trio of onion, tomato, and ginger-garlic paste, in roughly a 2:3 ratio of onion to tomato by weight. Use ripe, red tomatoes — 400g, about 4 medium — because pale, underripe tomatoes make a sour, thin gravy that no amount of spice can rescue. The onions must be browned properly, past golden and into deep amber, which takes a good 10 to 12 minutes; this caramelisation is where the gravy’s sweetness and colour come from. Whole spices — bay leaves, green cardamom, cloves, cinnamon, and cumin seeds — bloom in hot ghee at the start, perfuming the fat that carries every other flavour.
For ground spices, keep it traditional: turmeric, Kashmiri red chilli powder (for colour without searing heat), coriander powder, and garam masala added at the end so its volatile aromas survive. A teaspoon of kasuri methi, crushed between your palms and stirred in during the last five minutes, adds the faintly smoky, restaurant-style depth that separates good rajma from unforgettable rajma. Finish with ghee rather than oil if you can — its nutty richness is part of the dish’s soul — and a shower of fresh coriander. A squeeze of lemon at the table brightens the whole bowl.
Equipment You’ll Need
- Pressure cooker (or a heavy-bottomed pot with a tight lid, plus extra time)
- Heavy kadhai or deep, wide pan for the masala
- Large bowl for soaking the beans overnight
- Wooden spoon or flat spatula for stirring the masala
- Potato masher or the back of a ladle for mashing beans
- 250g (1.25 cups) dried red kidney beans (rajma), preferably the small Jammu variety
- 3 tbsp ghee (or neutral oil)
- 1 tsp cumin seeds
- 2 bay leaves
- 3 green cardamom pods, lightly crushed
- 4 cloves
- 2.5cm (1 inch) cinnamon stick
- 2 large onions (about 250g), finely chopped
- 1 tbsp ginger-garlic paste
- 4 medium ripe tomatoes (about 400g), pureed
- 0.5 tsp turmeric powder
- 1.5 tsp Kashmiri red chilli powder
- 2 tsp coriander powder
- 1 tsp garam masala, plus extra to finish
- 1 tsp kasuri methi (dried fenugreek leaves)
- 1.5 tsp salt, or to taste
- 750ml (3 cups) water, plus more as needed
- 3 tbsp chopped fresh coriander leaves
- 1 tbsp fresh cream — optional, for serving
- Lemon wedges and sliced onions, to serve
- Soak the rajma overnight: Rinse the beans well, then soak in a large bowl with at least three times their volume of water for 8 to 10 hours or overnight. The beans should look plump and nearly double in size. Drain and rinse again — never cook beans in their soaking water, which contains the compounds that cause digestive discomfort.
- Pressure-cook until creamy: Transfer the drained beans to a pressure cooker with 750ml of fresh water and 1 teaspoon of salt. Cook on high heat until the first whistle, then reduce to medium-low and cook for 5 to 6 whistles more, about 20 to 25 minutes total. Let the pressure release naturally. Test a bean by pressing it between your fingers — it should mash completely with no chalky centre. If using a regular pot, simmer covered for 60 to 90 minutes, topping up water as needed. Reserve the cooking liquid; it is liquid gold for the gravy.
- Bloom the whole spices: Heat the ghee in a heavy kadhai over medium heat until it shimmers. Add the cumin seeds, bay leaves, cardamom, cloves, and cinnamon, and fry for 30 to 40 seconds until the cumin darkens a shade and the air smells intensely aromatic. Do not let them burn — bitter spices will haunt the entire pot.
- Brown the onions deeply: Add the chopped onions with a pinch of salt and cook, stirring regularly, for 10 to 12 minutes until they turn deep golden-amber. This is not a step to rush: pale onions give a pale, raw-tasting gravy, while well-browned onions build sweetness and that characteristic dark colour. Add the ginger-garlic paste and fry for 2 minutes more until the raw smell disappears.
- Bhunao the tomato masala: Pour in the tomato puree along with the turmeric, Kashmiri chilli powder, and coriander powder. Cook over medium heat, stirring often, for 12 to 15 minutes. The masala will go through stages — first watery and bright red, then thickening and darkening. It is done when it turns a deep reddish-brown, looks glossy, and you see glistening oil separating at the edges of the pan. This bhunao stage is the entire secret of the recipe.
- Combine beans and masala: Tip the cooked rajma into the kadhai along with all of its cooking liquid. Add another 250ml of hot water if you like a looser gravy — remember the curry thickens as it sits. Stir well, crushing a ladleful of beans against the side of the pot to release their starch. This natural thickening is what gives rajma its signature clingy texture.
- Simmer low and slow: Bring to a gentle boil, then reduce the heat to low, partially cover, and simmer for 20 to 25 minutes, stirring occasionally. The gravy should thicken to coat the back of a spoon, and the beans should absorb the masala’s flavour — taste one; it should taste seasoned through, not bland inside. If the curry gets too thick, add hot water a little at a time.
- Finish like a dhaba: Crush the kasuri methi between your palms and stir it in along with the garam masala. Simmer 5 minutes more, then taste and adjust salt and chilli. Rest the curry off the heat for at least 15 minutes — this resting time marries the flavours in a way no amount of extra cooking can. Garnish with fresh coriander and a swirl of cream if you like, and serve hot.
Pro Tips for Perfect Results
- Never skip the overnight soak: Soaked beans cook evenly and digest better. In a pinch, a quick soak in boiling water for 2 hours works, but overnight is noticeably creamier.
- Salt the cooking water: Contrary to old myths, salting bean-cooking water does not toughen skins — it seasons the beans from within and improves texture.
- Brown, do not just soften, the onions: The difference between a 5-minute onion and a 12-minute onion is the difference between an okay rajma and a great one.
- Wait for the oil to separate: The masala is only ready when it darkens and oil glistens at the edges. Undercooked masala tastes raw no matter how long you simmer afterwards.
- Mash, don’t blend: Crushing a ladleful of beans with the back of a spoon thickens the gravy while keeping its rustic character. A blender would make it baby food.
- Rest before serving: Fifteen minutes off the heat lets the beans drink in the gravy. Rajma served straight off the flame always tastes slightly less married.
- Next-day rajma is the best rajma: Refrigerate overnight and reheat gently with a splash of water — the flavours deepen remarkably.
Variations to Try
Dhaba-Style Tadka Rajma: For special occasions, finish the curry with a sizzling tadka — heat 2 tablespoons of ghee until smoking, fry 4 sliced garlic cloves, 2 dried red chillies, and half a teaspoon of cumin seeds until golden, and pour it crackling over the rajma just before serving. The smoky garlic aroma is pure roadside dhaba.
Rajma with Mixed Beans: Replace a third of the rajma with black-eyed peas (lobia) or chickpeas for a heartier, more textured curry. Soak and cook them together; they finish in roughly the same time.
Amritsari-Style: Add 2 tablespoons of white butter and an extra half teaspoon of garam masala at the end, and serve with a glass of sweet lassi. Rich, indulgent, and unapologetic.
Rajma Paratha Filling: Drain leftover thick rajma, mash it coarsely with chopped onions, green chillies, and coriander, and stuff it into whole wheat dough for phenomenal stuffed parathas the next morning.
One-Pot Rajma Pulao: Layer the finished curry with half-cooked basmati rice, fried onions, and saffron milk in a heavy pot, then dum-cook on low for 20 minutes for a festive one-pot meal.
Serving Suggestions
The non-negotiable pairing is steamed basmati rice — long-grained, fragrant, and cooked so each grain stands separate. Ladle the rajma generously over the rice and let the gravy seep in; this is rajma-chawal, and it needs no further argument. A spoonful of ghee melting over the top is traditional and wonderful. On the side, serve sliced red onions tossed with lemon juice and salt, green chillies (whole or pickled), and a simple kachumber salad of cucumber, tomato, and onion for freshness. If you prefer bread, rajma is excellent with jeera rice, tandoori roti, or buttered pav for scooping. A glass of chaas or sweet lassi alongside makes it a complete Punjabi meal.
Storage and Reheating
Rajma is a meal-prep champion. It keeps in an airtight container in the refrigerator for 4 to 5 days, and the flavour genuinely improves by day two. Reheat gently on the stovetop over low heat, adding a splash of hot water to loosen the gravy, which thickens considerably when cold. It also freezes beautifully for up to 3 months — portion it into freezer-safe boxes, leaving headspace for expansion, and thaw overnight in the fridge before reheating. Cooked rajma should never sit at room temperature for more than 2 hours. If the curry tastes flat after refrigeration, a fresh tempering of garam masala and a squeeze of lemon will wake it right back up.
Frequently Asked Questions
Why are my rajma beans still hard after cooking?
The most common culprits are old beans, hard water, or insufficient soaking. Buy beans from a shop with good turnover, soak a full 8 to 10 hours, and add a quarter teaspoon of baking soda to hard soaking water. Also, never add acidic ingredients like tomatoes to undercooked beans — acid sets the skins and they will never soften. Always cook the beans fully tender before combining with the masala.
Can I make rajma without a pressure cooker?
Yes, but plan ahead. After the overnight soak, simmer the beans in a heavy pot with plenty of water for 60 to 90 minutes, keeping them topped up with hot water. They are done when a bean mashes completely between your fingers. The curry itself is identical from there.
How do I get a thick gravy without adding cream?
Mash a ladleful or two of the cooked beans directly in the pot and simmer the curry uncovered for the last 15 minutes. The beans’ natural starch thickens the gravy to a rich, clingy consistency — this is the traditional method, and it tastes better than any shortcut.
Is rajma-chawal healthy?
Genuinely, yes. Kidney beans are rich in protein, fibre, iron, and folate, with a low glycaemic index that keeps you full for hours. The dish becomes less virtuous only when drowned in ghee and cream — made as written here, with moderate ghee, it is a balanced, nourishing meal.
Can I use canned kidney beans?
You can in a real pinch — drain and rinse two 400g cans and add them at step 6, simmering 20 minutes. But honestly, the texture and flavour of beans cooked from dried in their own liquor is so superior that canned beans taste like a different dish. Dried rajma is cheap; give it the overnight soak.
What rice is best with rajma?
Long-grain basmati, aged at least a year, cooked with a 1:1.5 rice-to-water ratio so the grains stay separate and fluffy. Jeera rice (basmati tempered with cumin in ghee) is the festive upgrade.
Some dishes you cook; rajma is a dish you settle into, like a favourite chair. Make a big pot this weekend, eat it over rice with people you love, and save the leftovers — because tomorrow’s rajma, I promise you, is somehow even better than today’s. Happy cooking!