Recipe Card
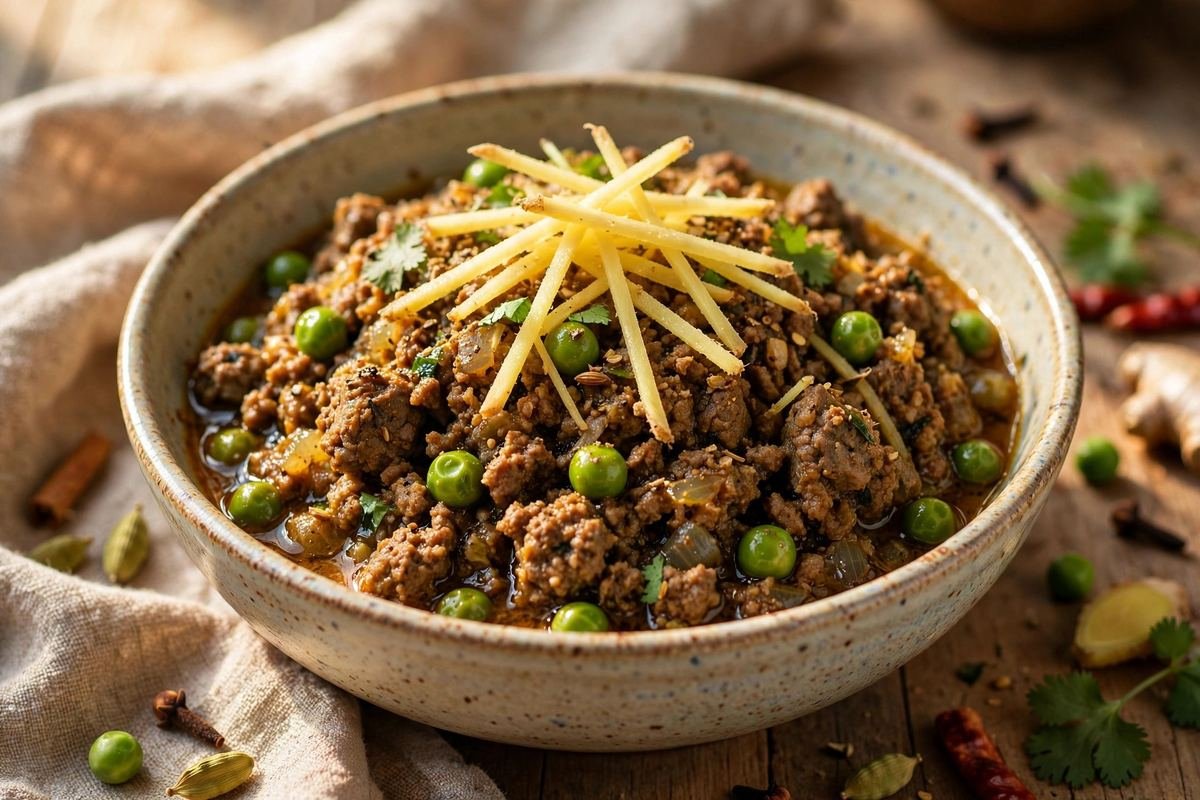
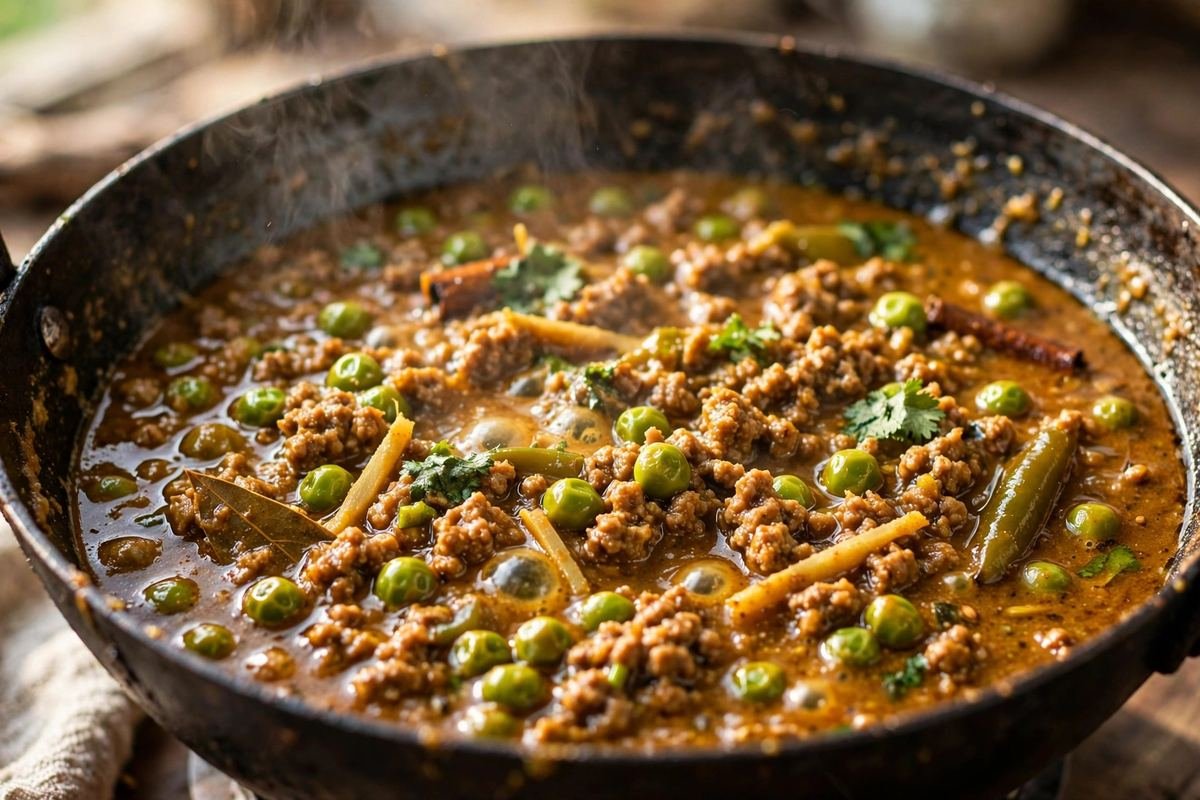
Juicy spiced mince simmered with sweet green peas in a rich onion-tomato masala. A beloved North Indian classic that turns simple keema into pure comfort.
Ingredients
- 500 g mutton mince (or chicken mince), about 15–20% fat
- 3 tbsp oil or ghee
- 1 tsp cumin seeds
- 2 bay leaves
- 4 green cardamom pods, lightly crushed
- 1-inch cinnamon stick
- 2 large onions (about 350 g), finely chopped
- 1 tbsp ginger-garlic paste, plus 1-inch fresh ginger cut into juliennes for garnish
- 2 medium tomatoes (about 250 g), finely chopped
- 3 tbsp plain full-fat yoghurt, whisked smooth
- 2 green chillies, slit lengthwise
- 1 tsp turmeric powder
- 1½ tbsp coriander powder
- 1 tsp cumin powder
- 1 tsp Kashmiri red chilli powder, plus hot chilli powder to taste
- 1 tsp garam masala, divided
- 1¼ tsp salt, or to taste
- 1 cup (150 g) green peas, fresh or frozen
- 1 cup (240 ml) hot water, plus more as needed
- 2 tbsp chopped fresh coriander leaves
Instructions
- Bloom the spices. Heat the oil or ghee in a heavy kadhai over medium heat. Add the cumin seeds, bay leaves, cardamom, and cinnamon. Sizzle for 30–40 seconds until the cumin turns a shade darker and the oil smells warm and fragrant. Keep the heat moderate — burnt whole spices will bitter the entire dish.
- Golden the onions. Add the chopped onions with ½ teaspoon of the salt. Cook over medium heat for 10–12 minutes, stirring regularly, until the onions are soft, golden, and sweet-smelling. They should be well past translucent with lightly browned edges — this caramelisation is the gravy’s flavour base.
- Build the masala. Stir in the ginger-garlic paste and cook 1–2 minutes until the raw aroma fades. Add the tomatoes, turmeric, coriander powder, cumin powder, Kashmiri chilli powder, and half the garam masala. Cook over medium heat for 7–8 minutes, mashing the tomatoes with your spoon, until the masala thickens, darkens, and you see oil separating at the edges.
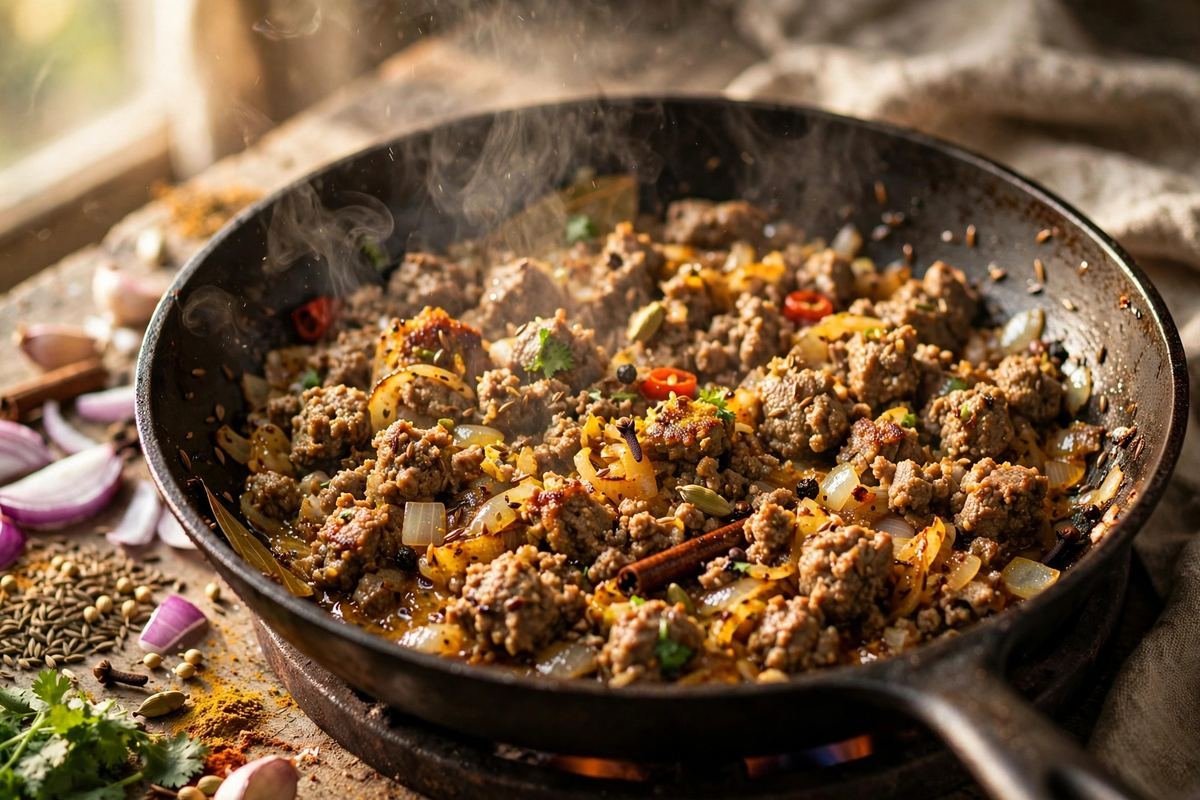
- Add the mince and break it down. Raise the heat to medium-high and add all the mince, breaking it up with your spoon as it goes in. Now work it: stir, chop, and mash continuously for 8–10 minutes. Use the edge of the spoon or a potato masher to crush every lump until the mince is a mass of fine, separate grains. The meat will release water first, then the water evaporates and the mince begins to brown and fry in the oil — listen for the sizzle to change from wet bubbling to a drier crackle. This browning step builds enormous flavour; do not rush it.
- Add yoghurt carefully. Reduce the heat to low. Add the whisked yoghurt one tablespoon at a time, stirring constantly after each addition, until fully incorporated. This gentle method prevents splitting. Cook for 2–3 minutes, stirring, until the yoghurt melds into the masala and the oil glistens again.
- Simmer with water. Pour in 1 cup of hot water and add the slit green chillies and remaining salt. Stir well, bring to a boil, then reduce to low, cover, and simmer for 15 minutes (10 minutes if using chicken mince). The meat should be completely tender and the gravy thick enough to cling to the mince rather than pool thinly.
- Add the peas. Stir in the green peas — straight from frozen is fine. Cover and simmer 5–7 minutes more until the peas are tender but still bright green and the gravy has thickened to a juicy, spoonable consistency. If it looks dry, add a splash of hot water; if too thin, simmer uncovered for a few minutes.
- Finish and rest. Stir in the remaining ½ teaspoon garam masala and half the coriander leaves. Taste and adjust salt and chilli. Turn off the heat, cover, and rest for 5–10 minutes — the flavours settle and the oil rises beautifully. Serve garnished with ginger juliennes and the remaining coriander.
Tip: Read through the full post below for step-by-step photos, pro tips, variations and FAQs before you start cooking.
The Khansama’s Everyday Masterpiece
Keema matar occupies a special place in the Indian kitchen — it is the dish of Muslim khansamas and home cooks alike, the weeknight answer to the grand dum biryanis and niharis of celebratory tables. Minced meat, whether mutton or chicken, has been part of Indian cooking since Mughal times, when royal kitchens ground meat fine for kebabs and koftas. But keema matar belongs to the people. It is the curry that stretches half a kilo of mince to feed a family of six, the filling inside samosas and parathas, the topping spooned over pav at Irani cafés, and the gravy mopped up with tandoori roti at home.
The genius of the dish is its balance. Mince on its own can be heavy and one-note; the sweet pop of green peas cuts through the richness, while the onion-tomato masala — cooked until it surrenders into the meat — binds everything into a juicy, spoonable whole. Done right, keema matar is neither dry nor soupy: each crumble of meat glistens with spiced oil, and the peas stay bright green and just tender, little bursts of sweetness against the savoury depth.
What separates great keema matar from mediocre is texture. The mince must be broken down into fine, separate grains — no lumps, no rubbery clumps. This happens in the first ten minutes of cooking, when the raw mince hits the hot masala and you work it relentlessly with a spoon or potato masher, breaking and stirring until every strand separates. Skip this and you get meatballs-in-gravy; do it properly and you get the loose, juicy crumble that defines the dish.
The spicing is warm rather than fiery — garam masala, coriander, and cumin form the backbone, with green chillies providing fresh heat and a final shower of ginger juliennes adding pungent bite. It is the kind of curry that tastes like someone’s grandmother is still in charge of the kitchen, even when you are the one cooking it.
Why You’ll Love This Recipe
- Deeply satisfying — rich, juicy, and savoury, it hits every comfort-food note in one bowl.
- Versatile superstar — serve as a curry, stuff it in parathas, top pav with it, or layer it into shepherd’s-pie-style bakes.
- Stretches the budget — peas, onions, and potatoes (optional) bulk out the mince to generously feed four to six.
- Freezer hero — keema freezes brilliantly, so a double batch means future dinners sorted.
- Customisable heat — mild enough for kids as written, easily fired up with extra chillies for heat-seekers.
- One-pan cooking — the whole dish builds in a single kadhai, from blooming spices to final simmer.
Key Ingredients Explained
Mince (keema): The heart of the dish. Mutton (goat) mince is the traditional choice — it has the deepest flavour and a fat content that keeps the curry juicy. Chicken mince works beautifully too and cooks faster; choose thigh mince over breast for moisture. Whatever you use, look for mince with around 15–20% fat; ultra-lean mince turns dry and pebbly. If your mince seems very lean, add an extra tablespoon of oil or ghee at the start. Freshly minced meat from a trusted butcher beats pre-packaged for texture, but good-quality packaged mince is perfectly fine.
Green peas: The “matar” half of the equation. Fresh peas in winter are a joy — sweet, tender, needing only minutes. Frozen peas are the year-round workhorse and honestly excellent here; add them straight from frozen, no thawing needed. Avoid canned peas, which turn mushy and dull-coloured in the simmer.
Onions: Two large onions, finely chopped, form the masala base. They need to go past translucent to lightly golden — this caramelisation sweetens the gravy and balances the meat’s savouriness. Do not purée them; the fine chop melts into the mince while keeping the curry’s rustic texture.
Yoghurt: A few tablespoons of whisked plain yoghurt, stirred in after the masala is cooked, adds tang and helps tenderise the meat. The crucial technique: lower the heat before adding it and stir constantly, or it will split into grainy curds. Full-fat dahi is non-negotiable here — low-fat yoghurt splits almost guaranteed.
Garam masala: Added in two stages — half with the ground spices to cook into the meat, half at the end for fresh aroma. This layering gives the curry both depth and brightness.
Fresh ginger: Used twice: grated into the masala for warmth, and cut into fine juliennes for the final garnish. Those raw ginger slivers on top are not decoration — their sharp heat is the classic counterpoint to rich keema.
Green chillies and coriander: Chillies go in slit so their heat infuses gently and they can be pushed aside by the cautious; coriander leaves finish the dish with fresh, citrusy lift.
Equipment You’ll Need
- Heavy-bottomed kadhai or deep sauté pan — for even browning of the mince
- Sturdy wooden spoon or potato masher — essential for breaking the mince into fine grains
- Sharp knife and cutting board — fine chopping for onions and ginger juliennes
- Small bowl — for whisking the yoghurt smooth before adding
- 500 g mutton mince (or chicken mince), about 15–20% fat
- 3 tbsp oil or ghee
- 1 tsp cumin seeds
- 2 bay leaves
- 4 green cardamom pods, lightly crushed
- 1-inch cinnamon stick
- 2 large onions (about 350 g), finely chopped
- 1 tbsp ginger-garlic paste, plus 1-inch fresh ginger cut into juliennes for garnish
- 2 medium tomatoes (about 250 g), finely chopped
- 3 tbsp plain full-fat yoghurt, whisked smooth
- 2 green chillies, slit lengthwise
- 1 tsp turmeric powder
- 1½ tbsp coriander powder
- 1 tsp cumin powder
- 1 tsp Kashmiri red chilli powder, plus hot chilli powder to taste
- 1 tsp garam masala, divided
- 1¼ tsp salt, or to taste
- 1 cup (150 g) green peas, fresh or frozen
- 1 cup (240 ml) hot water, plus more as needed
- 2 tbsp chopped fresh coriander leaves
Instructions
- Bloom the spices. Heat the oil or ghee in a heavy kadhai over medium heat. Add the cumin seeds, bay leaves, cardamom, and cinnamon. Sizzle for 30–40 seconds until the cumin turns a shade darker and the oil smells warm and fragrant. Keep the heat moderate — burnt whole spices will bitter the entire dish.
- Golden the onions. Add the chopped onions with ½ teaspoon of the salt. Cook over medium heat for 10–12 minutes, stirring regularly, until the onions are soft, golden, and sweet-smelling. They should be well past translucent with lightly browned edges — this caramelisation is the gravy’s flavour base.
- Build the masala. Stir in the ginger-garlic paste and cook 1–2 minutes until the raw aroma fades. Add the tomatoes, turmeric, coriander powder, cumin powder, Kashmiri chilli powder, and half the garam masala. Cook over medium heat for 7–8 minutes, mashing the tomatoes with your spoon, until the masala thickens, darkens, and you see oil separating at the edges.
- Add the mince and break it down. Raise the heat to medium-high and add all the mince, breaking it up with your spoon as it goes in. Now work it: stir, chop, and mash continuously for 8–10 minutes. Use the edge of the spoon or a potato masher to crush every lump until the mince is a mass of fine, separate grains. The meat will release water first, then the water evaporates and the mince begins to brown and fry in the oil — listen for the sizzle to change from wet bubbling to a drier crackle. This browning step builds enormous flavour; do not rush it.
- Add yoghurt carefully. Reduce the heat to low. Add the whisked yoghurt one tablespoon at a time, stirring constantly after each addition, until fully incorporated. This gentle method prevents splitting. Cook for 2–3 minutes, stirring, until the yoghurt melds into the masala and the oil glistens again.
- Simmer with water. Pour in 1 cup of hot water and add the slit green chillies and remaining salt. Stir well, bring to a boil, then reduce to low, cover, and simmer for 15 minutes (10 minutes if using chicken mince). The meat should be completely tender and the gravy thick enough to cling to the mince rather than pool thinly.
- Add the peas. Stir in the green peas — straight from frozen is fine. Cover and simmer 5–7 minutes more until the peas are tender but still bright green and the gravy has thickened to a juicy, spoonable consistency. If it looks dry, add a splash of hot water; if too thin, simmer uncovered for a few minutes.
- Finish and rest. Stir in the remaining ½ teaspoon garam masala and half the coriander leaves. Taste and adjust salt and chilli. Turn off the heat, cover, and rest for 5–10 minutes — the flavours settle and the oil rises beautifully. Serve garnished with ginger juliennes and the remaining coriander.
Pro Tips for Perfect Results
- Break the mince relentlessly. The first 10 minutes determine the texture. Mash and stir until no lumps remain — fine grains absorb masala; clumps stay bland inside.
- Do not skip the browning. After the mince releases its water, keep cooking until it actually fries and browns in the oil. That Maillard crust is where the deep, meaty flavour lives.
- Room-temperature mince browns better. Take the keema out of the fridge 20 minutes before cooking so it sears instead of steaming.
- Low heat for yoghurt. Adding yoghurt over high heat is the number one cause of a split, grainy gravy. Low heat, one spoon at a time, constant stirring.
- Fat is flavour. If your mince is very lean, compensate with an extra tablespoon of ghee. Dry keema is almost always a fat problem, not a spice problem.
- Peas go in late. Adding peas too early turns them olive-grey and mushy. They need only 5–7 minutes to stay sweet and vivid.
- Taste for salt twice. Once after the simmer, once after resting — the flavours concentrate as the curry sits, and the final seasoning often needs a nudge.
- A squeeze of lemon wakes it up. If the curry tastes flat despite correct salt, a teaspoon of lemon juice at the end brightens everything without making it sour.
Variations to Try
Keema pav (Mumbai style): Make the curry slightly drier, pile it onto butter-toasted pav, and top with chopped onions and a squeeze of lime — street food royalty. Aloo keema: Add 2 small diced potatoes with the water and simmer until tender; the potatoes soak up the masala and stretch the dish further. Shahi keema: Stir in 3 tablespoons of cream and a pinch of saffron-soaked milk at the end for a richer, Mughlai-leaning version. Keema paratha filling: Cook the curry until completely dry, cool it, and stuff into whole-wheat parathas — the dryness is essential so the parathas do not tear. Soya keema (vegetarian): Replace the meat with 1½ cups of rehydrated soya granules (squeezed very dry) and proceed identically; add an extra tablespoon of oil since soya is fat-free. Hyderabadi touch: Finish with a handful of mint leaves and a teaspoon of lemon juice for a fresher, tangier profile.
Serving Suggestions
Keema matar is famously versatile. With butter pav or tandoori roti it becomes an Irani-café-style meal; with steamed basmati or jeera rice it is pure home comfort. Lachha parathas are magnificent for scooping. On the side, keep it simple: sliced onions, lemon wedges, and a cucumber raita to cool the palate. For a dinner spread, pair with dal tadka and a crisp kachumber salad. And do not overlook breakfast — leftover keema folded into a masala omelette or spooned over toast is one of India’s great unsung morning meals.
Storage and Reheating
Refrigerate in an airtight container for up to 4 days; like most minced-meat dishes, it improves overnight as the flavours meld. Reheat on the stovetop over medium-low heat with a splash of water, stirring gently — the mince reheats quickly and evenly. It freezes superbly for up to 3 months: portion into meal-sized containers, thaw overnight in the fridge, and reheat thoroughly. The peas soften slightly after freezing but remain perfectly pleasant. Always bring refrigerated keema to a full simmer when reheating, and never refreeze thawed portions.
Frequently Asked Questions
Can I use chicken mince instead of mutton?
Yes — chicken keema matar is lighter and very popular. Reduce the covered simmering time to about 10 minutes since chicken cooks faster, and consider adding an extra tablespoon of oil or ghee because chicken mince is leaner. The spicing stays exactly the same.
My keema turned out lumpy. How do I fix it next time?
Lumps form when the mince hits the pan in a cold clump and is not broken up aggressively enough. Next time, crumble the mince with your fingers as you add it, keep the heat at medium-high, and mash continuously with a potato masher for the full 8–10 minutes until every grain is separate.
Why did my yoghurt split?
Almost always heat shock: yoghurt added to a screaming-hot masala curdles instantly. Always lower the heat first, whisk the yoghurt completely smooth, add it a spoonful at a time while stirring, and use full-fat dahi — low-fat versions split far more easily.
Can I make keema matar in a pressure cooker?
You can, and it is faster: complete the masala and browning steps, add water and peas, then pressure cook for 2 whistles (about 8 minutes) for mutton or 1 whistle for chicken. Release pressure naturally for 5 minutes. The trade-off is slightly less control over the final gravy thickness — simmer uncovered afterwards to reduce if needed.
How do I make it less oily without losing flavour?
Use chicken mince or drain excess fat after browning the mutton mince, and cut the oil to 2 tablespoons. Keep the ghee finish (1 teaspoon stirred in at the end) — a little fat at the finish carries the spices’ aroma far more effectively than fat cooked out earlier.
Is keema matar gluten-free?
The curry itself is naturally gluten-free — just check that your garam masala and other ground spices have no added fillers. Serve with rice instead of bread for a fully gluten-free meal.
Keema matar is the kind of recipe that earns a permanent place in your repertoire — humble ingredients, honest technique, and a result that tastes like it took all day. Master the browning, respect the resting time, and you will have a curry that feeds a crowd, fills a freezer, and never once feels like a compromise. This is home cooking at its most generous.