Recipe Card
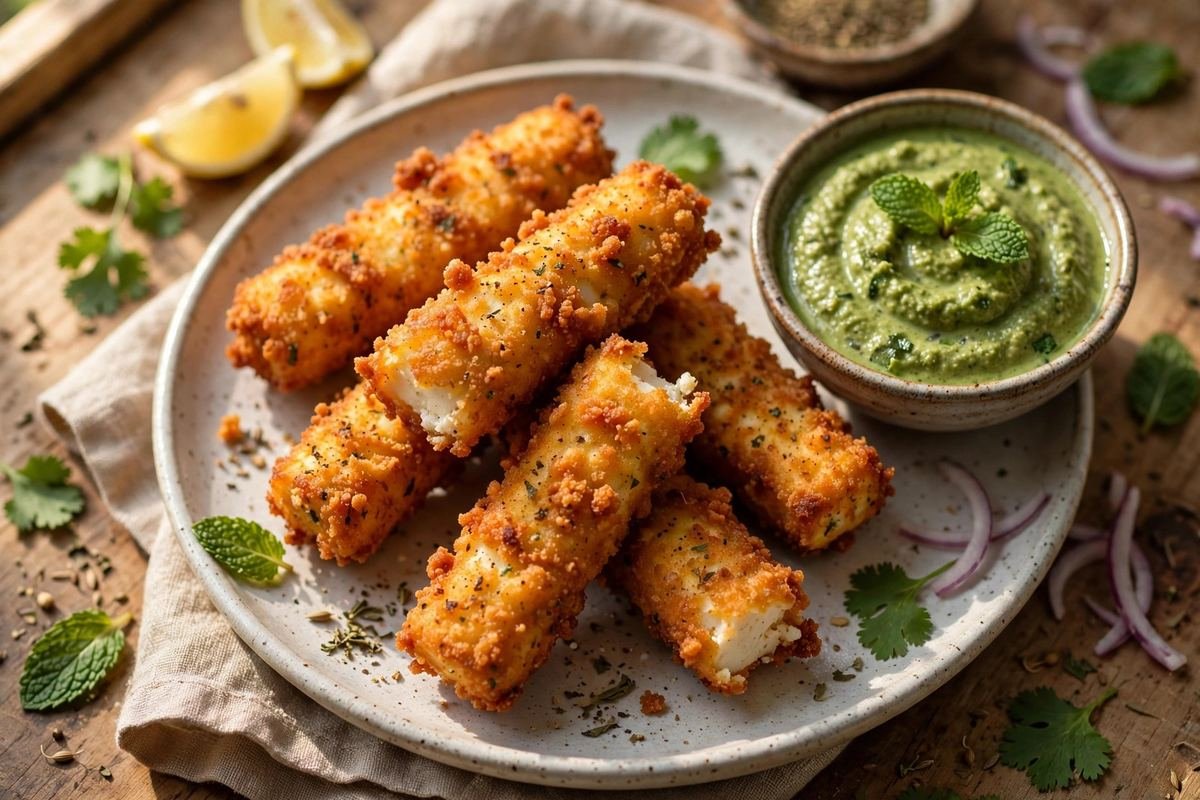
Golden, crunchy paneer fritters wrapped in a spiced gram-flour batter — the ultimate chai-time snack. This recipe gives you restaurant-style crisp pakoras with a soft, creamy centre every time.
Ingredients
- 400g fresh paneer, cut into 4 cm (1.5-inch) cubes
- 1 cup (120g) besan (gram flour), sifted
- 2 tablespoons rice flour
- 1 teaspoon ajwain (carom seeds), lightly crushed
- 1 teaspoon Kashmiri red chilli powder
- 1/2 teaspoon turmeric powder
- 1 teaspoon coriander powder
- 1/2 teaspoon amchur (dried mango powder) or 1 teaspoon lemon juice
- 1/8 teaspoon baking soda
- 1 teaspoon salt, plus more to taste
- 2 green chillies, finely chopped (optional, for heat)
- 2 tablespoons finely chopped fresh coriander leaves
- 3/4 cup (180 ml) water, approximately — add gradually
- 1 tablespoon hot oil (moyan), for the batter
- 750 ml to 1 litre neutral oil (sunflower or groundnut), for deep frying
- To serve: mint-coriander chutney, lemon wedges, and thinly sliced onion rings
Instructions
- Prepare the paneer. Cut the paneer into even 4 cm cubes and pat them completely dry with a kitchen towel — surface moisture is the enemy of a crisp coating. If using store-bought paneer that feels firm, soak the cubes in warm water with a pinch of salt for 15 minutes, then drain and pat dry. Season the cubes lightly with a pinch of salt and half the amchur, and let them sit while you make the batter so the seasoning soaks in.
- Mix the dry batter ingredients. In a large bowl, combine the sifted besan, rice flour, crushed ajwain, Kashmiri chilli powder, turmeric, coriander powder, remaining amchur, baking soda, and salt. Whisk thoroughly so the spices and leavening are evenly distributed — pockets of baking soda will taste soapy. Stir in the chopped green chillies and coriander leaves.
- Bring the batter together. Add water a little at a time — start with half a cup — whisking to a thick, smooth paste before adding more. You are aiming for a coating consistency like thick pancake batter or ribbon-stage cake batter: it should coat the back of a spoon and hold a line when you draw your finger through it, roughly 3/4 cup total. Beat in one tablespoon of hot oil (heated until it shimmers) as the final step; this moyan makes the fried crust noticeably crisper. Rest the batter for 10 minutes — the besan hydrates and the consistency improves.
- Heat the oil. Pour oil into the kadhai to a depth of at least 7–8 cm and heat over medium-high until it reaches 170–175°C (340–350°F). Test without a thermometer: drop in a tiny bead of batter — it should sizzle vigorously, sink briefly, then rise to the surface within 2 seconds surrounded by bubbles. If it browns instantly, the oil is too hot; if it sits on the bottom, it is too cool.
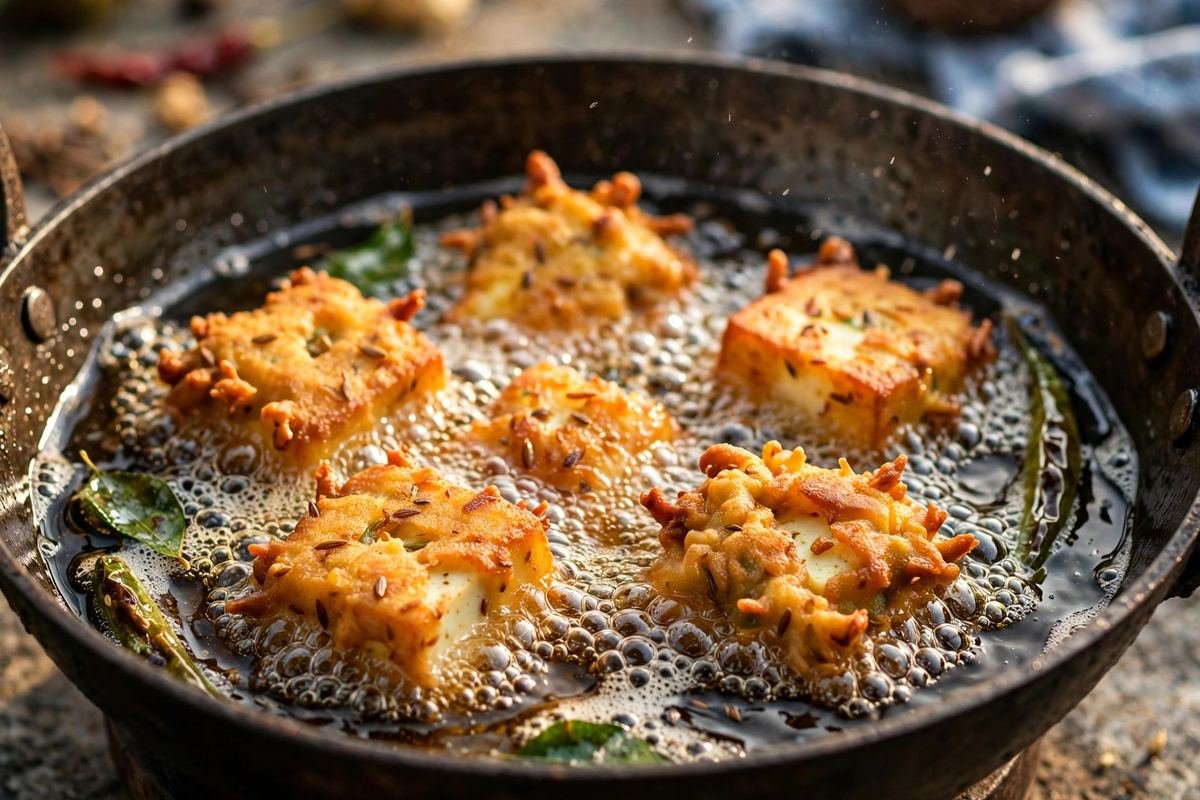
- Coat and fry the first batch. Working with 5–6 cubes at a time, dip each paneer cube into the batter, turning to coat completely, and let the excess drip off for a second. Slide them gently into the hot oil from just above the surface — never drop from a height or the oil will splash. Do not crowd the pan; overcrowding drops the oil temperature and produces greasy pakoras. Fry for 2–3 minutes, turning once or twice with the slotted spoon, until the coating is pale gold and just set.
- Double-fry for maximum crunch. Lift the first batch out onto the wire rack and let them rest for 2–3 minutes while you fry the remaining batches the same way. Once all pakoras have had their first fry, increase the heat slightly and return them to the oil in batches for a second fry of 1–2 minutes, until deeply golden and audibly crisp. This two-stage method drives out residual moisture and is the single biggest difference between home pakoras and halwai-style ones.
- Drain and season. Transfer the twice-fried pakoras to the wire rack and immediately sprinkle with a pinch of chaat masala and a few drops of lemon juice while they are still glistening — the seasoning clings best to hot oil. Let them rest for exactly 2 minutes (the crust sets and the interior finishes steaming into creaminess), then serve immediately.
Tip: Read through the full post below for step-by-step photos, pro tips, variations and FAQs before you start cooking.
The Story Behind the Pakora
There is a particular sound that belongs to Indian monsoon evenings — rain hammering the windowsill, thunder rolling somewhere far away, and the furious sizzle of pakoras hitting hot oil. Every Indian household has this memory. The moment the first drops fall, someone puts the chai on and someone else reaches for the besan, and within minutes the whole house smells of frying fritters. Pakoras are not just a snack in India; they are an emotion, a weather forecast made edible.
The pakora’s history stretches back centuries, appearing in early Indian culinary traditions as a way to transform humble vegetables into something celebratory. The genius of it is the batter: chickpea flour, or besan, whipped with water and spices into a coating that turns shatteringly crisp in hot oil while protecting whatever is inside. Onion pakoras, potato pakoras, green chilli pakoras — every region has its champion. But the paneer pakora holds a special place, particularly in Delhi, Punjab, and the dhabas lining the highways of the north.
Paneer pakora takes the humble fritter and makes it rich. Cubes of fresh, milky paneer are folded into a batter spiked with ajwain, chilli, and turmeric, then fried until the outside is deeply golden and the inside turns soft and creamy from the heat. The contrast is what makes it irresistible — a rugged, crunchy shell giving way to mild, pillowy cheese. Street vendors in Delhi serve them scorching hot in paper cones with a tangle of raw onion rings, a squeeze of lemon, and a dollop of green chutney that makes your eyes water in the best way.
This recipe recreates that street-cart magic at home, with the consistency restaurants achieve and home cooks often miss. The secret is not complicated — it is about batter thickness, oil temperature, and a double-fry technique that guarantees a crust that stays crisp long after the pakoras leave the oil. Make these once for evening chai and they will become your rainy-day ritual too.
Why You’ll Love This Recipe
- Shatteringly crisp coating: a tested batter ratio and double-fry method keep the crust crunchy for ages, not soggy within minutes.
- Creamy, soft centre: fresh paneer turns meltingly tender inside the hot shell — the contrast is unbeatable.
- Ready in 45 minutes: minimal prep, simple pantry spices, and a batter that comes together in minutes.
- Perfect chai companion: pairs beautifully with masala chai, green chutney, and tamarind sauce.
- Crowd-friendly: easily doubled for parties, and the batter works with onions, potatoes, and chillies too.
- No fancy equipment: a kadhai or deep pan and a slotted spoon are all you need.
Key Ingredients Explained
Paneer is the soul of this dish, and its quality decides everything. Use fresh, firm paneer — either homemade or a good store-bought block. It should be soft enough to yield under a knife but firm enough to hold a clean cube. Cut it into generous pieces, roughly 4 cm (1.5 inches), because small cubes overcook and turn rubbery while large ones stay creamy inside. If your paneer feels hard or crumbly, soak it in warm salted water for 15 minutes before cutting; this revives store-bought paneer remarkably well. Avoid paneer that has been frozen and thawed more than once, as it tends to become grainy.
Besan (gram flour) forms the batter and is non-negotiable — it is what gives pakoras their characteristic nutty flavour and golden colour. Always sift it before mixing to remove lumps, and use fresh besan; flour that has sat in the pantry for months loses its aroma and can taste bitter. A small addition of rice flour (about two tablespoons) is the professional trick for extra crispness — it fries up lighter and stays crunchy longer than besan alone.
Ajwain (carom seeds) are the signature spice of a proper pakora batter. They add a thyme-like, slightly pungent note that cuts through the richness of frying and aids digestion. Crush them lightly between your palms before adding so their oils release into the batter. Kashmiri red chilli powder gives colour without excessive heat, while a pinch of turmeric deepens the golden hue. A tiny amount of baking soda — no more than an eighth of a teaspoon — makes the batter puff slightly and fry up airier, but too much will leave a soapy taste, so measure carefully.
Oil temperature is really an ingredient in fried food. Use a neutral oil with a high smoke point such as sunflower, groundnut, or mustard oil refined for frying. The oil should be at 170–175°C (340–350°F) — hot enough that a drop of batter sizzles and rises within two seconds, but not so hot that the crust browns before the paneer warms through.
Equipment You’ll Need
- A kadhai or deep, heavy-bottomed pan — retains heat steadily so the oil temperature does not crash when pakoras go in.
- A slotted spoon or spider strainer — for lowering pakoras in and lifting them out without breaking the coating.
- A kitchen thermometer (optional but helpful) — takes the guesswork out of oil temperature.
- A wire rack set over a tray — draining on a rack keeps the bottoms crisp; paper towels make them steam and soften.
- A large mixing bowl and whisk — for a smooth, lump-free batter.
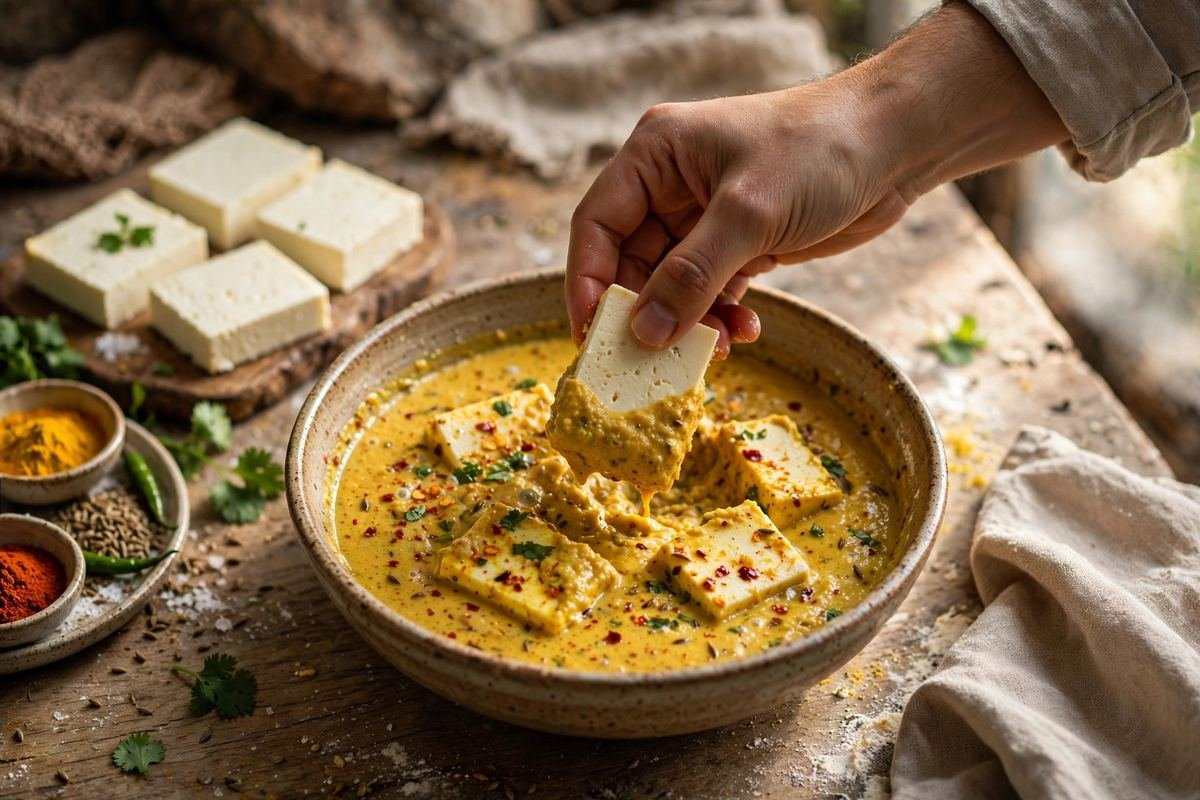
- 400g fresh paneer, cut into 4 cm (1.5-inch) cubes
- 1 cup (120g) besan (gram flour), sifted
- 2 tablespoons rice flour
- 1 teaspoon ajwain (carom seeds), lightly crushed
- 1 teaspoon Kashmiri red chilli powder
- 1/2 teaspoon turmeric powder
- 1 teaspoon coriander powder
- 1/2 teaspoon amchur (dried mango powder) or 1 teaspoon lemon juice
- 1/8 teaspoon baking soda
- 1 teaspoon salt, plus more to taste
- 2 green chillies, finely chopped (optional, for heat)
- 2 tablespoons finely chopped fresh coriander leaves
- 3/4 cup (180 ml) water, approximately — add gradually
- 1 tablespoon hot oil (moyan), for the batter
- 750 ml to 1 litre neutral oil (sunflower or groundnut), for deep frying
- To serve: mint-coriander chutney, lemon wedges, and thinly sliced onion rings
- Prepare the paneer. Cut the paneer into even 4 cm cubes and pat them completely dry with a kitchen towel — surface moisture is the enemy of a crisp coating. If using store-bought paneer that feels firm, soak the cubes in warm water with a pinch of salt for 15 minutes, then drain and pat dry. Season the cubes lightly with a pinch of salt and half the amchur, and let them sit while you make the batter so the seasoning soaks in.
- Mix the dry batter ingredients. In a large bowl, combine the sifted besan, rice flour, crushed ajwain, Kashmiri chilli powder, turmeric, coriander powder, remaining amchur, baking soda, and salt. Whisk thoroughly so the spices and leavening are evenly distributed — pockets of baking soda will taste soapy. Stir in the chopped green chillies and coriander leaves.
- Bring the batter together. Add water a little at a time — start with half a cup — whisking to a thick, smooth paste before adding more. You are aiming for a coating consistency like thick pancake batter or ribbon-stage cake batter: it should coat the back of a spoon and hold a line when you draw your finger through it, roughly 3/4 cup total. Beat in one tablespoon of hot oil (heated until it shimmers) as the final step; this moyan makes the fried crust noticeably crisper. Rest the batter for 10 minutes — the besan hydrates and the consistency improves.
- Heat the oil. Pour oil into the kadhai to a depth of at least 7–8 cm and heat over medium-high until it reaches 170–175°C (340–350°F). Test without a thermometer: drop in a tiny bead of batter — it should sizzle vigorously, sink briefly, then rise to the surface within 2 seconds surrounded by bubbles. If it browns instantly, the oil is too hot; if it sits on the bottom, it is too cool.
- Coat and fry the first batch. Working with 5–6 cubes at a time, dip each paneer cube into the batter, turning to coat completely, and let the excess drip off for a second. Slide them gently into the hot oil from just above the surface — never drop from a height or the oil will splash. Do not crowd the pan; overcrowding drops the oil temperature and produces greasy pakoras. Fry for 2–3 minutes, turning once or twice with the slotted spoon, until the coating is pale gold and just set.
- Double-fry for maximum crunch. Lift the first batch out onto the wire rack and let them rest for 2–3 minutes while you fry the remaining batches the same way. Once all pakoras have had their first fry, increase the heat slightly and return them to the oil in batches for a second fry of 1–2 minutes, until deeply golden and audibly crisp. This two-stage method drives out residual moisture and is the single biggest difference between home pakoras and halwai-style ones.
- Drain and season. Transfer the twice-fried pakoras to the wire rack and immediately sprinkle with a pinch of chaat masala and a few drops of lemon juice while they are still glistening — the seasoning clings best to hot oil. Let them rest for exactly 2 minutes (the crust sets and the interior finishes steaming into creaminess), then serve immediately.
Pro Tips for Perfect Results
- Thickness of batter is everything. Too thin and it slides off the paneer leaving bald spots; too thick and it turns doughy inside. The finger-line test on the back of a spoon never fails — adjust with a teaspoon of water or besan as needed.
- Never skip the double fry. The first fry cooks the batter through; the short second fry at slightly higher heat is what creates that glass-like shatter. Restaurants do this as standard practice.
- Keep the oil temperature steady. If your pakoras are browning too fast, lower the heat and wait a minute — oil holds heat, so adjustments take a moment to register. Fry in small batches without exception.
- Pat the paneer dry. Even a little surface water creates steam under the batter, which loosens the coating and makes it fall off in the oil.
- Serve within 10 minutes. Pakoras are at their peak straight from the second fry. If you must hold them, keep them on a wire rack in a warm (120°C / 250°F) oven, never covered or stacked.
- Refresh the oil between batches. Skim out any loose batter bits with the slotted spoon — burnt crumbs stick to fresh pakoras and taste bitter.
- Taste and adjust the batter. Fry one test pakora first, taste it, and correct salt or chilli in the batter before committing the whole batch.
Variations to Try
Stuffed paneer pakora: sandwich a thin layer of mint chutney or a spicy potato filling between two thin paneer slices, press gently, then batter and fry — a Delhi street-cart classic.
Bread pakora style: place a paneer slice inside a triangle of bread, dip the whole parcel in batter, and fry for a heartier snack.
Tandoori-spiced: marinate the paneer cubes in hung curd, tandoori masala, and mustard oil for 30 minutes before battering, for a smoky fusion twist.
Spinach and paneer: fold finely chopped blanched spinach into the batter for colour, iron, and a lovely green-flecked crust.
Air-fryer version: brush battered paneer generously with oil and air-fry at 200°C (400°F) for 12–15 minutes, flipping halfway. It will not match deep-fried crunch, but it satisfies the craving with far less oil.
Serving Suggestions
Paneer pakora demands to be eaten hot, straight from the rack, with strong masala chai — that pairing is non-negotiable in most Indian homes. Set out a trio of accompaniments: a vibrant mint-coriander chutney, a sweet-tart tamarind chutney, and a simple kachumber of sliced onions, lemon wedges, and a dusting of chaat masala. For a party platter, pile the pakoras on a large thali lined with a banana leaf or parchment, scatter onion rings and coriander over the top, and let guests build their own bites. They also make a superb starter before a North Indian meal of dal makhani and naan, and leftovers (if any) can be tucked into a toasted sandwich with chutney for the next day’s lunch.
Storage and Reheating
Pakoras are genuinely best fresh, but if you have extras, cool them completely on the wire rack and refrigerate in an airtight container lined with paper towel for up to 2 days. To reheat, never use the microwave — it turns the crust rubbery. Instead, spread them on a baking tray and bake at 200°C (400°F) for 8–10 minutes, or air-fry at 190°C (375°F) for 5–6 minutes, until the coating re-crisps. You can also prepare the batter up to 4 hours ahead (refrigerated, without the baking soda — stir that in just before frying) and keep cut paneer ready, so frying takes only 15 minutes when guests arrive. Cooked pakoras do not freeze well; the paneer turns spongy on thawing.
Frequently Asked Questions
Why did my batter slide off the paneer in the oil?
Three usual culprits: the paneer was wet, the batter was too thin, or the oil was not hot enough. Pat the cubes bone-dry, make sure the batter coats thickly, and confirm the oil is at 170°C+ before the first cube goes in. A test pakora will tell you everything before you commit.
Can I make paneer pakora without deep frying?
You can shallow-fry them in 1 cm of oil in a heavy pan, turning carefully — the crust will be slightly less even but still delicious. The air-fryer method in the variations section also works. Baking alone tends to dry out the batter before it crisps, so it is the least successful alternative.
My pakoras turned out oily and heavy. What went wrong?
Almost always oil temperature that was too low, or overcrowding the pan — both let the batter absorb oil instead of instantly sealing. Keep the heat steady, fry 5–6 at a time, and do not start the next batch until the oil has recovered its temperature for a full minute.
Can I use the same batter for vegetable pakoras?
Absolutely — this batter is excellent with sliced onion, potato, cauliflower florets, and green chillies. Vegetables release water, so fry them in smaller batches and expect a slightly longer cooking time for dense vegetables like potato.
How do I keep pakoras crisp for a party?
Do the first fry up to 2 hours ahead and the second fry just before serving. If you must hold finished pakoras, keep them uncovered on a wire rack in a warm oven (120°C / 250°F) — covering or stacking traps steam and softens the crust within minutes.
Is baking soda really necessary?
It helps the batter puff and fry up lighter, but the pakoras will still be good without it — just slightly denser. If you skip it, add an extra tablespoon of rice flour for crispness. Never increase the quantity beyond 1/8 teaspoon or you will taste it.
There you have it — golden, crackling paneer pakoras with that creamy centre that makes people reach for a second before finishing the first. Put the chai on, fry a fresh batch, and watch the rain fall. Some recipes feed the stomach; this one feeds the whole evening.