Recipe Card
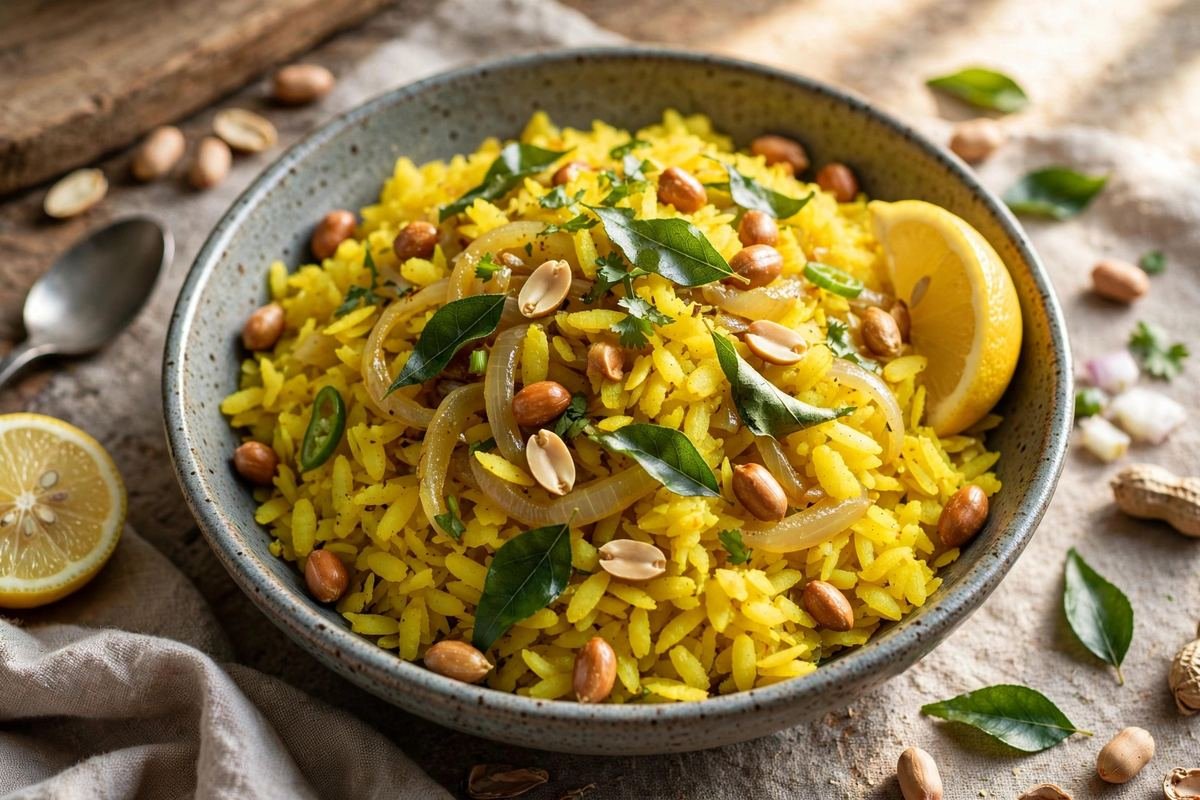
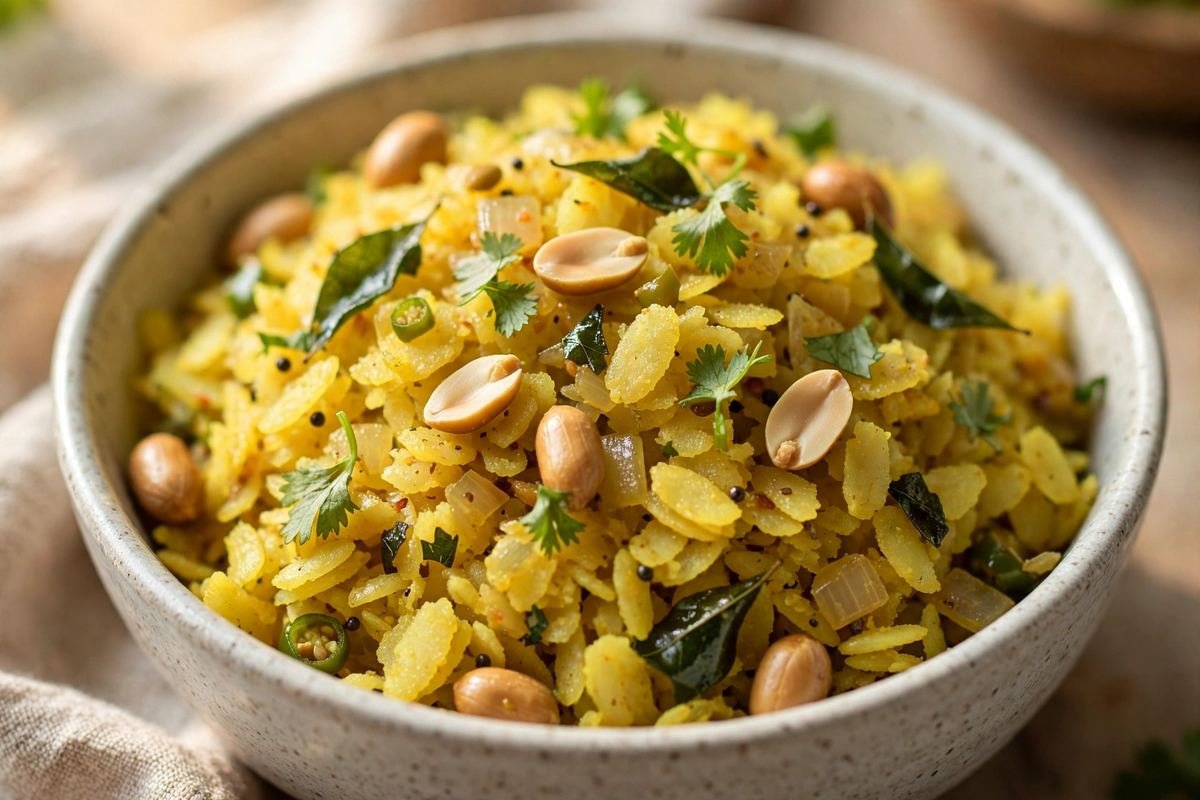
Soft, fluffy kanda poha with sweet onions, crunchy peanuts, and a squeeze of lemon — Maharashtra’s beloved 20-minute breakfast. Learn the no-mush technique for perfect poha every time.
Ingredients
- 3 cups (about 150g) thick poha (flattened rice)
- 2 large onions, thinly sliced
- 1/4 cup raw peanuts
- 2 tbsp oil
- 1 tsp mustard seeds
- 1 tsp cumin seeds
- 8-10 curry leaves
- 2-3 green chillies, slit lengthwise
- 1/4 tsp asafoetida (hing), optional
- 1/2 tsp turmeric powder
- 1 tsp sugar
- 1 tsp salt, or to taste
- 2 tbsp lemon juice (about 1 lemon), plus wedges to serve
- 3 tbsp chopped fresh coriander leaves
- 2 tbsp grated fresh coconut, optional
- Sev and extra roasted peanuts, to garnish
Instructions
- Rinse the poha — gently and quickly. Put the poha in a large colander and hold it under running water for 20-30 seconds, tossing once or twice with your fingers so every flake gets wet. Then stop. The most common mistake is soaking poha; it needs only a rinse. Shake off the excess water thoroughly — lift the colander and let it drain for a full minute. The flakes should look damp and slightly translucent, not sitting in water.
- Rest the poha. Tip the rinsed poha into a wide bowl, sprinkle over the salt, sugar, and turmeric, and toss very gently with your fingertips — not a spoon, which breaks the flakes. Cover and rest for 5-10 minutes. In this time the flakes absorb the surface moisture and turn soft and fluffy. Taste one: it should be tender with no hard, dry core. If a few flakes still feel hard, sprinkle — do not pour — a teaspoon of water over them and rest 5 more minutes.
- Fry the peanuts. Heat the oil in your wide kadhai over medium heat. Add the raw peanuts and fry, stirring, for 2-3 minutes until golden and crisp. They will continue to darken slightly off the heat, so pull them just as they turn golden. Scoop them out with a slotted spoon and set aside — leaving them in means they overcook while the onions fry.
- Make the tempering. In the same oil, add the mustard seeds and wait for them to pop completely — listen for the sputtering to finish. Add cumin seeds, curry leaves (they will splutter; a lid held nearby helps), slit green chillies, and hing if using. Stir for 20-30 seconds until the curry leaves turn crisp and glossy.
- Soften the onions. Add the sliced onions and a small pinch of salt. Cook over medium heat for 5-6 minutes, stirring occasionally, until they are soft, translucent, and just starting to turn golden at the edges. Do not rush this on high heat — sweet, silky onions are the flavour base of the whole dish.
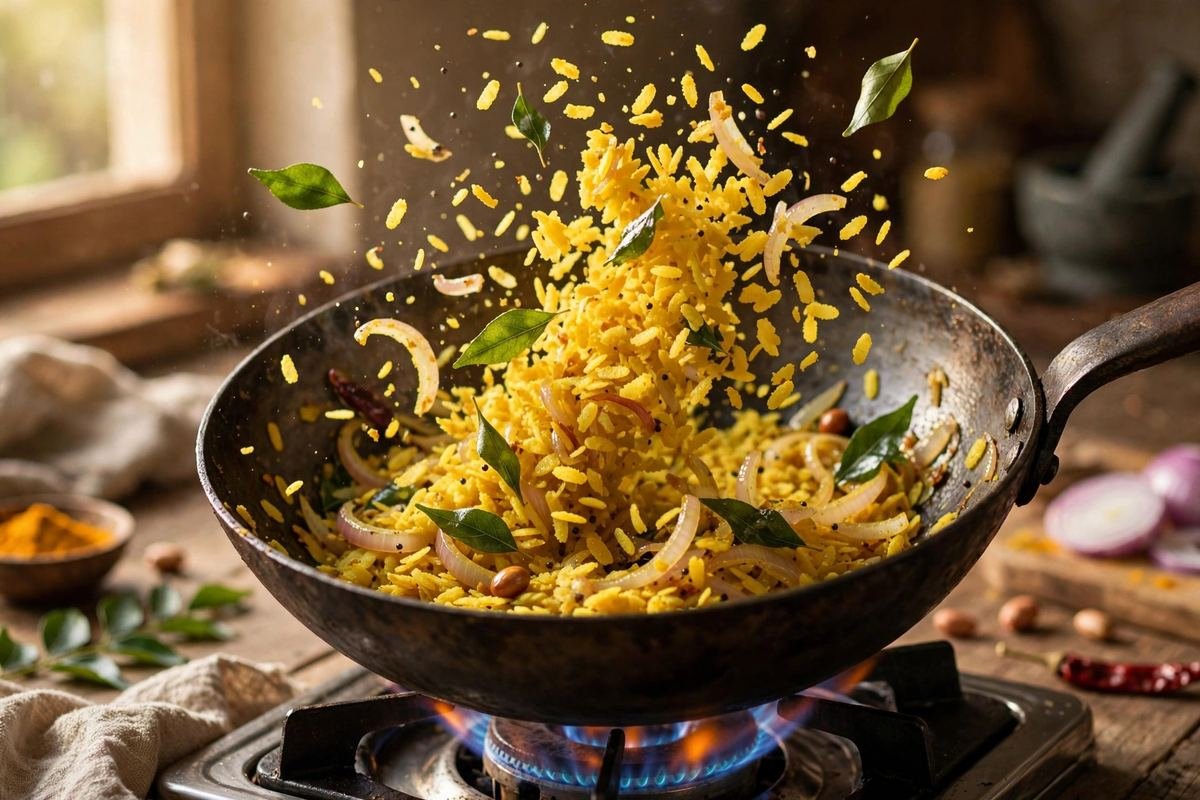
- Combine with the poha. Reduce the heat to low. Add the rested poha to the pan along with the fried peanuts. Toss gently but thoroughly with a light hand, lifting and folding rather than stirring hard, for 2-3 minutes until every flake is coated in the golden onion-turmeric mixture and heated through. If the poha seems dry, sprinkle a tablespoon of water around the edges of the pan — never pour water directly onto the flakes.
- Finish with lemon and coriander. Turn off the heat. Squeeze over the lemon juice, add the chopped coriander and grated coconut if using, and toss once more. Taste and adjust — it should be bright, lightly tangy, with a whisper of sweetness. Cover and rest 2 minutes so the flavours settle.
- Serve hot. Pile onto plates, top with a shower of sev, extra roasted peanuts, and a lemon wedge on the side. Kanda poha waits for no one — it is at its fluffy best in the first 15 minutes.
Tip: Read through the full post below for step-by-step photos, pro tips, variations and FAQs before you start cooking.
Ask anyone from Maharashtra what they ate for breakfast growing up, and there is a very good chance the answer is poha. Not the fancy kind, not a restaurant reinvention — just a humble plate of flattened rice tossed with onions, turmeric, peanuts, and lemon, eaten hot from a steel plate with a cup of chai. Kanda poha — literally “onion poha” — is the everyday version, the one mothers make on busy school mornings and the one that shows up at every Maharashtrian wedding breakfast buffet, because it feeds a crowd without fuss and pleases absolutely everyone.
Poha itself is ingenious. Paddy is parboiled, flattened into paper-thin flakes, and dried — which means it is already cooked. All it needs is a quick rinse and a few minutes of rest to soften. That is why kanda poha can go from packet to plate in twenty minutes, and why it became the definitive quick breakfast across central India, from Mumbai’s chawls to Indore’s famous poha-jalebi stalls. In Indore, poha is practically a religion: served with crunchy sev, pomegranate, and a jalebi on the side, eaten standing up at dawn by people who will argue passionately about which stall does it best.
What I love about kanda poha is its balance. The poha is soft and neutral, the onions turn sweet and silky, the peanuts add crunch, the lemon brings brightness, and the tempering of mustard seeds, curry leaves, and green chillies ties it all together with that unmistakable tadka aroma. A pinch of sugar — very Maharashtrian — rounds the edges. It is light enough that you do not feel weighed down, but substantial enough to carry you to lunch. And it is endlessly forgiving, which makes it the perfect first recipe for anyone learning to cook Indian food.
The one thing that separates great poha from mediocre poha is texture. Mushy, clumpy poha is the classic beginner mistake, and it comes entirely from how you handle the flakes before they hit the pan. Get the rinsing right — and this recipe will show you exactly how — and your poha will be fluffy, separate, and perfect every single time.
Why You’ll Love This Recipe
- Ready in 25 minutes — genuinely one of the fastest hot breakfasts in Indian cooking, with minimal chopping.
- No-mush guarantee — the exact rinsing and resting technique for fluffy, separate flakes every time.
- Pantry-friendly — poha, onions, peanuts, and basic spices are all you need; no special shopping.
- Light yet filling — steamed, not fried, with very little oil; easy on the stomach but satisfying.
- Endlessly adaptable — add peas, potatoes, or carrots when you want a heartier version.
- Kid-approved — mild, slightly sweet, soft-textured; most children who reject everything else will eat poha.
Key Ingredients Explained
Poha comes in three thicknesses, and this is the single most important choice in the recipe. You want thick poha (also labelled “dagdi poha” or “thick aval”) — the sturdy flakes that hold their shape after rinsing. Medium poha works in a pinch but needs an even lighter hand with water. Thin or “paper” poha (used for chivda) will dissolve into mush here; save it for snack mixes. Good thick poha flakes are white to off-white, dry, and snap cleanly.
Onions (kanda) are the soul of this dish, hence the name. Slice them thinly rather than chopping — thin slices soften into sweet, silky ribbons that weave through the poha. Two large onions for three cups of poha is the right ratio; this is an onion-forward dish, not a garnish situation. Cook them until just soft and translucent with golden edges, not deeply browned.
Raw peanuts add the essential crunch. Fry them in the tempering oil until golden and crisp before anything else goes in — this both cooks them and flavours the oil. If you are short on time, roasted peanuts stirred in at the end work, but the freshly fried ones are noticeably better.
Turmeric gives poha its characteristic golden colour; add it to the onions so it blooms in the oil and coats everything evenly. Green chillies provide gentle heat — slit them so their flavour infuses without making the dish fiery. A teaspoon of sugar is the quiet Maharashtrian signature; it does not make the poha sweet, it just balances the lemon and turmeric. And lemon juice must go in off the heat, at the very end — cooking lemon makes it bitter. Fresh coriander and a handful of sev or roasted peanuts on top complete the plate.
Equipment You’ll Need
- A large colander or fine-mesh sieve for rinsing the poha
- A wide, heavy-bottomed kadhai or large non-stick pan (wide surface = less clumping)
- A flat spatula or wooden spoon for gentle tossing
- A lid for the resting step
- 3 cups (about 150g) thick poha (flattened rice)
- 2 large onions, thinly sliced
- 1/4 cup raw peanuts
- 2 tbsp oil
- 1 tsp mustard seeds
- 1 tsp cumin seeds
- 8-10 curry leaves
- 2-3 green chillies, slit lengthwise
- 1/4 tsp asafoetida (hing), optional
- 1/2 tsp turmeric powder
- 1 tsp sugar
- 1 tsp salt, or to taste
- 2 tbsp lemon juice (about 1 lemon), plus wedges to serve
- 3 tbsp chopped fresh coriander leaves
- 2 tbsp grated fresh coconut, optional
- Sev and extra roasted peanuts, to garnish
- Rinse the poha — gently and quickly. Put the poha in a large colander and hold it under running water for 20-30 seconds, tossing once or twice with your fingers so every flake gets wet. Then stop. The most common mistake is soaking poha; it needs only a rinse. Shake off the excess water thoroughly — lift the colander and let it drain for a full minute. The flakes should look damp and slightly translucent, not sitting in water.
- Rest the poha. Tip the rinsed poha into a wide bowl, sprinkle over the salt, sugar, and turmeric, and toss very gently with your fingertips — not a spoon, which breaks the flakes. Cover and rest for 5-10 minutes. In this time the flakes absorb the surface moisture and turn soft and fluffy. Taste one: it should be tender with no hard, dry core. If a few flakes still feel hard, sprinkle — do not pour — a teaspoon of water over them and rest 5 more minutes.
- Fry the peanuts. Heat the oil in your wide kadhai over medium heat. Add the raw peanuts and fry, stirring, for 2-3 minutes until golden and crisp. They will continue to darken slightly off the heat, so pull them just as they turn golden. Scoop them out with a slotted spoon and set aside — leaving them in means they overcook while the onions fry.
- Make the tempering. In the same oil, add the mustard seeds and wait for them to pop completely — listen for the sputtering to finish. Add cumin seeds, curry leaves (they will splutter; a lid held nearby helps), slit green chillies, and hing if using. Stir for 20-30 seconds until the curry leaves turn crisp and glossy.
- Soften the onions. Add the sliced onions and a small pinch of salt. Cook over medium heat for 5-6 minutes, stirring occasionally, until they are soft, translucent, and just starting to turn golden at the edges. Do not rush this on high heat — sweet, silky onions are the flavour base of the whole dish.
- Combine with the poha. Reduce the heat to low. Add the rested poha to the pan along with the fried peanuts. Toss gently but thoroughly with a light hand, lifting and folding rather than stirring hard, for 2-3 minutes until every flake is coated in the golden onion-turmeric mixture and heated through. If the poha seems dry, sprinkle a tablespoon of water around the edges of the pan — never pour water directly onto the flakes.
- Finish with lemon and coriander. Turn off the heat. Squeeze over the lemon juice, add the chopped coriander and grated coconut if using, and toss once more. Taste and adjust — it should be bright, lightly tangy, with a whisper of sweetness. Cover and rest 2 minutes so the flavours settle.
- Serve hot. Pile onto plates, top with a shower of sev, extra roasted peanuts, and a lemon wedge on the side. Kanda poha waits for no one — it is at its fluffy best in the first 15 minutes.
Pro Tips for Perfect Results
- Buy thick poha, always. If your packet just says “poha,” check the flakes — they should be sturdy and opaque. Thin flakes are for chivda, not this recipe.
- Rinse, do not soak. Twenty to thirty seconds under running water is enough. Poha continues absorbing moisture as it rests, so err on the side of less water.
- Drain thoroughly. Water pooling at the bottom of the bowl is the direct cause of mushy poha. Shake the colander, then shake it again.
- Use a wide pan. Crowding poha in a small deep pan steams it into clumps. A wide kadhai gives every flake contact with the heat.
- Toss, do not stir. A heavy hand breaks the softened flakes into paste. Lift and fold gently, like you are tossing a delicate salad.
- Lemon goes in last, off the heat. Heat turns lemon juice bitter and dull. The same goes for the coriander — fresh herbs hate prolonged cooking.
- Season the onions, not just the poha. A pinch of salt on the onions while they cook draws out moisture and builds a deeper flavour base.
Variations to Try
The classic upgrades are batata poha (with diced potato, fried golden before the onions) and matar poha (with green peas, fresh or frozen, added with the onions). Mixed vegetable poha with carrots, beans, and corn turns it into a complete one-bowl meal. For the famous Indori poha experience, top generously with sev, pomegranate seeds, chopped raw onion, and serve with a piece of jalebi — sweet with savoury is the whole point. Dadpe poha is the no-cook Maharashtrian cousin: thin poha mixed with raw onion, coconut, and a raw tempering of oil, mustard, and lemon. In a hurry, a handful of roasted cashews instead of peanuts makes it feel festive.
Serving Suggestions
Kanda poha is best served immediately, steaming hot, with a cup of masala chai — the pairing is iconic for a reason. Set out lemon wedges, extra sev, and chopped coriander so everyone can customise their plate. For a bigger breakfast spread, serve it alongside upma or misal pav at a brunch, or with fresh fruit and curd on the side. It also packs beautifully for tiffin boxes and train journeys — it tastes good at room temperature and does not spoil quickly, which is why generations of travellers have carried it.
Storage and Reheating
Poha is at its best fresh and does not love being stored, but leftovers keep 1-2 days in an airtight container in the fridge. To reheat, sprinkle a teaspoon of water over the poha, cover, and warm in a pan over low heat for 3-4 minutes, tossing gently — the microwave works too, covered, in 60-90 second bursts. A fresh squeeze of lemon and a sprinkle of coriander after reheating revives it considerably. Do not freeze poha; the flakes turn gummy on thawing. Rinsed, uncooked poha does not keep either — only rinse what you plan to cook right away.
Frequently Asked Questions
Why did my poha turn out mushy and sticky?
Too much water, almost certainly — either from over-rinsing, poor draining, or using thin poha flakes. Next time, rinse for no more than 30 seconds, drain thoroughly, and check you bought thick poha. Also make sure your pan is wide enough; overcrowding steams the flakes into a clump.
Can I make poha without onion and garlic?
Yes — skip the onion and you have a Jain-friendly version. Add diced potato or extra peanuts for substance, and consider a pinch more sugar and lemon to compensate for the missing onion sweetness. Many people make it this way during fasting or religious observances.
Is poha healthy? Is it good for weight loss?
Poha is a genuinely light breakfast: it is steamed, low in fat, easy to digest, and a decent source of iron and carbohydrates. Whether it suits weight loss depends on portion size — stick to about a cup of dry poha per person, go easy on the peanuts and sev, and bulk it up with vegetables. The lemon juice also helps with iron absorption.
Can I prepare poha in advance for a party?
You can rinse and rest the poha up to 30 minutes ahead, and chop everything in advance, but cook it fresh — poha stiffens as it sits. For a crowd, cook in two batches rather than one giant pan, and keep the first batch covered in a warm oven while the second cooks.
What is the difference between kanda poha and batata poha?
Kanda poha foregrounds onion; batata poha includes diced potato (batata) fried until golden before the onions go in. Many home versions include both. The technique is otherwise identical.
My poha tastes bland. What am I missing?
Usually salt or lemon — poha needs assertive seasoning because the flakes themselves are neutral. Taste after adding the lemon and adjust both. Also check your turmeric is fresh, and do not skip the sugar; that tiny amount makes a surprising difference to the overall balance.
There is a reason this dish has survived generations without a single change to its soul. Make it on a weekday morning when time is short, eat it hot with chai, and notice how something so simple can feel so complete. Then make it again on Sunday — because by then, someone in your house will be asking for it.