Recipe Card
Golden, crisp aloo parathas stuffed with spiced mashed potatoes — the beloved Punjabi breakfast. Learn the no-tear rolling technique for perfect stuffed parathas.
Ingredients
- 2 cups whole wheat flour (atta, 240g), plus extra for dusting
- 3/4 cup warm water (180ml), plus a tablespoon or two more as needed
- 1 tsp neutral oil or melted ghee, for the dough
- 3/4 tsp fine salt, for the dough
- 4 medium potatoes (about 500g), boiled whole, cooled and grated
- 1-inch piece fresh ginger (about 15g), finely grated
- 2 green chillies, finely chopped (adjust to taste)
- 1/2 cup fresh coriander leaves, finely chopped (a generous handful)
- 1 tsp ajwain (carom seeds), lightly crushed between the palms
- 1 tsp amchur (dry mango powder) or 1 tbsp coarsely crushed anardana
- 1 tsp roasted cumin powder
- 1/2 tsp garam masala
- 1/2 tsp red chilli powder (optional, for extra heat)
- 3/4 tsp fine salt for the filling, or to taste
- Ghee or oil, as needed for roasting (about 3–4 tbsp total)
Instructions
- Boil the potatoes right. Scrub the potatoes and boil them whole and unpeeled in generously salted water until a knife slides in with no resistance, about 20–25 minutes. Drain them thoroughly and leave them in the colander for at least 10 minutes so surface steam escapes — this drying step is what keeps the filling fluffy instead of gluey. For the very best texture, do this step a few hours ahead or the night before and refrigerate the potatoes; cold, rested potatoes grate into perfect dry shreds.
- Make a soft, pliable dough. In a large bowl, combine the atta and salt, then drizzle in the oil or ghee. Add the warm water a little at a time, mixing with your hand until a shaggy mass forms, then knead firmly for 5 minutes until smooth, soft and slightly tacky — softer than your usual roti dough. Cover with a damp towel and rest for 20–30 minutes; this relaxes the gluten so the dough will stretch around the filling instead of springing back and tearing.
- Mix a dry, well-seasoned filling. Peel the cooled potatoes and grate them on the large holes of a box grater into a wide bowl. Add the ginger, green chillies, coriander, crushed ajwain, amchur, cumin, garam masala, red chilli powder if using, and salt. Mix gently with a fork or your fingertips — never mash aggressively or overwork it, which releases starch and turns it sticky. Taste and adjust: it should be boldly seasoned, a touch saltier and tangier than you think, because the plain dough will mute it.
- Portion dough and filling evenly. Divide the rested dough into 8 equal balls and the filling into 8 equal portions — eyeballing this is the most common cause of blowouts, because an oversized lump of filling cannot be sealed. Keep the dough balls covered under the damp towel so they do not dry out, and work with one at a time.
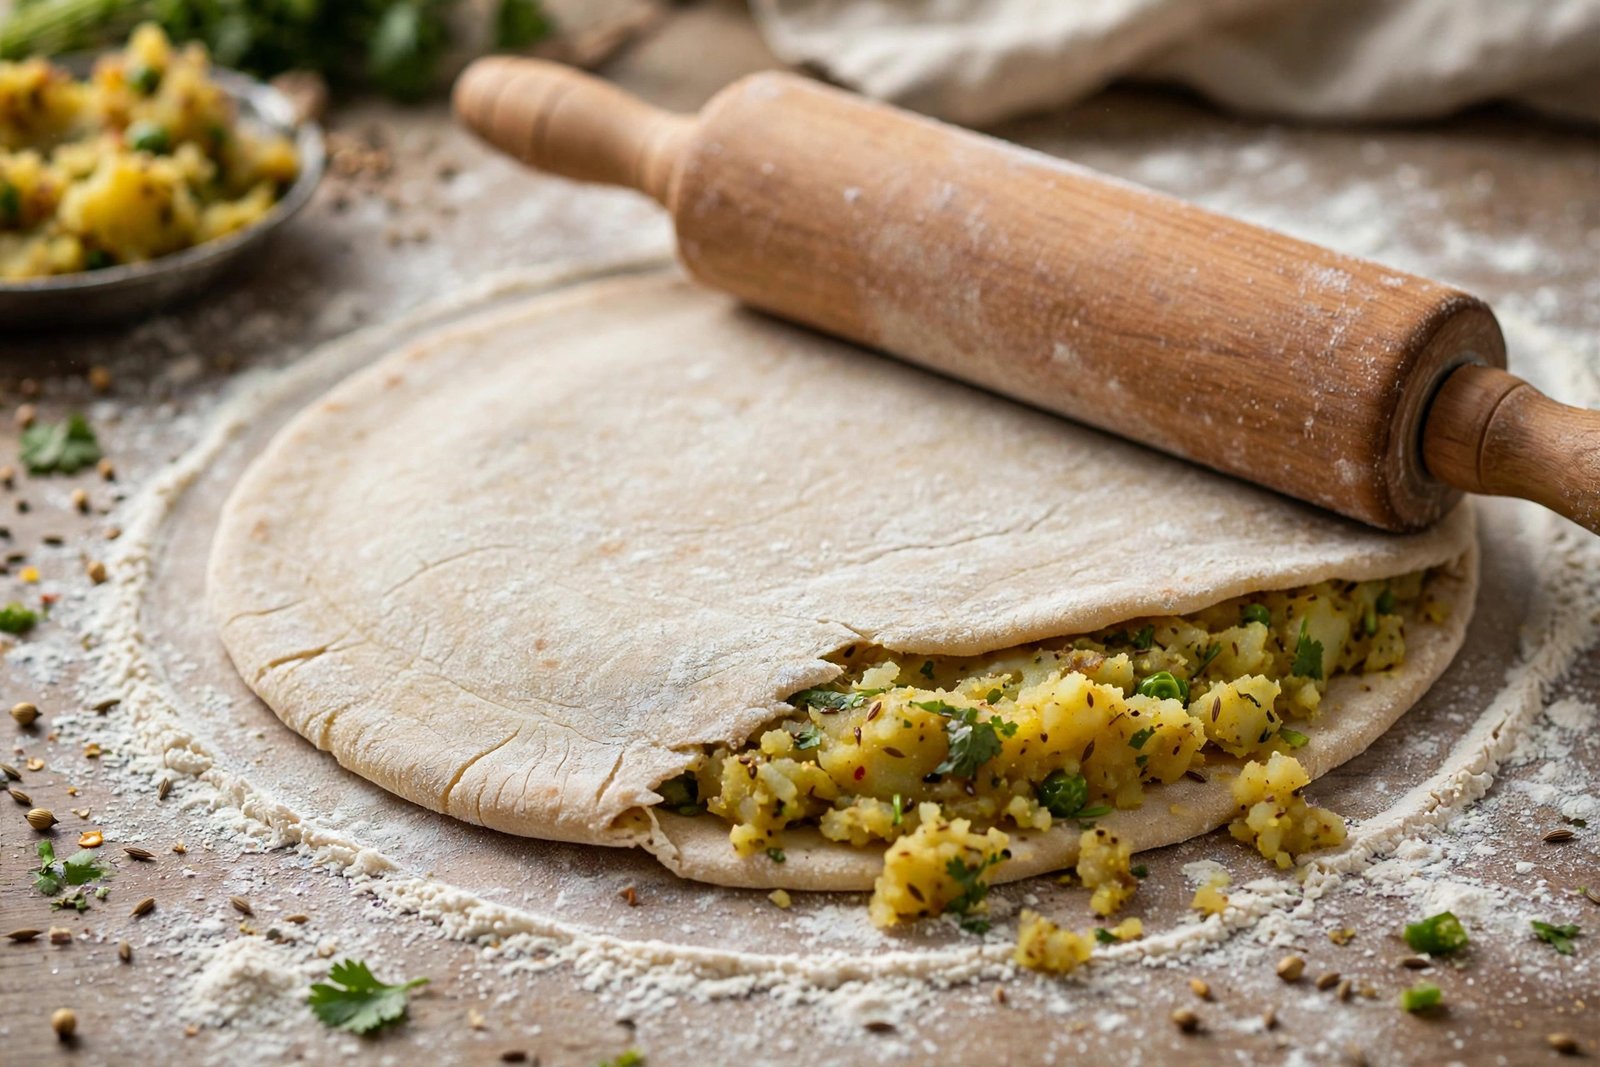
- Fill and seal using the cup method. Flatten one dough ball into a thick disc about 3 inches across, keeping the centre slightly thicker than the edges. Cup it in your palm, place a portion of filling in the hollow, then gather the edges up and over the filling like a little money bag. Pinch the gathered dough firmly to seal, twist off any excess, and press the sealed side down. A tight seal with no trapped air pockets is the secret to tear-free rolling.
- Roll gently and evenly. Dust the stuffed ball lightly with dry flour and roll from the centre outward, rotating a quarter turn between strokes, to a circle about 6–7 inches across and just under 1/4 inch thick. Use light, even pressure — let the weight of the pin do the work. If a tiny tear appears, dab it with a pinch of dry flour and keep going; small patches seal themselves on the hot tawa. Roll each paratha just before it hits the tawa rather than stacking raw ones.
- Heat the tawa properly. Set your tawa or cast-iron skillet over medium-high heat for 3–4 minutes until a sprinkling of flour sizzles and browns within seconds. The tawa must be properly hot before the first paratha lands — too cool and the paratha dries out before it colours; too fierce and the outside chars while the inside stays raw.
- Roast the first side. Lay the rolled paratha on the hot tawa and cook for 45–60 seconds until you see small bubbles and the underside has pale, dry patches. Flip it with a spatula — this first flip should happen before any browning, which keeps the paratha soft and lets steam start building inside.
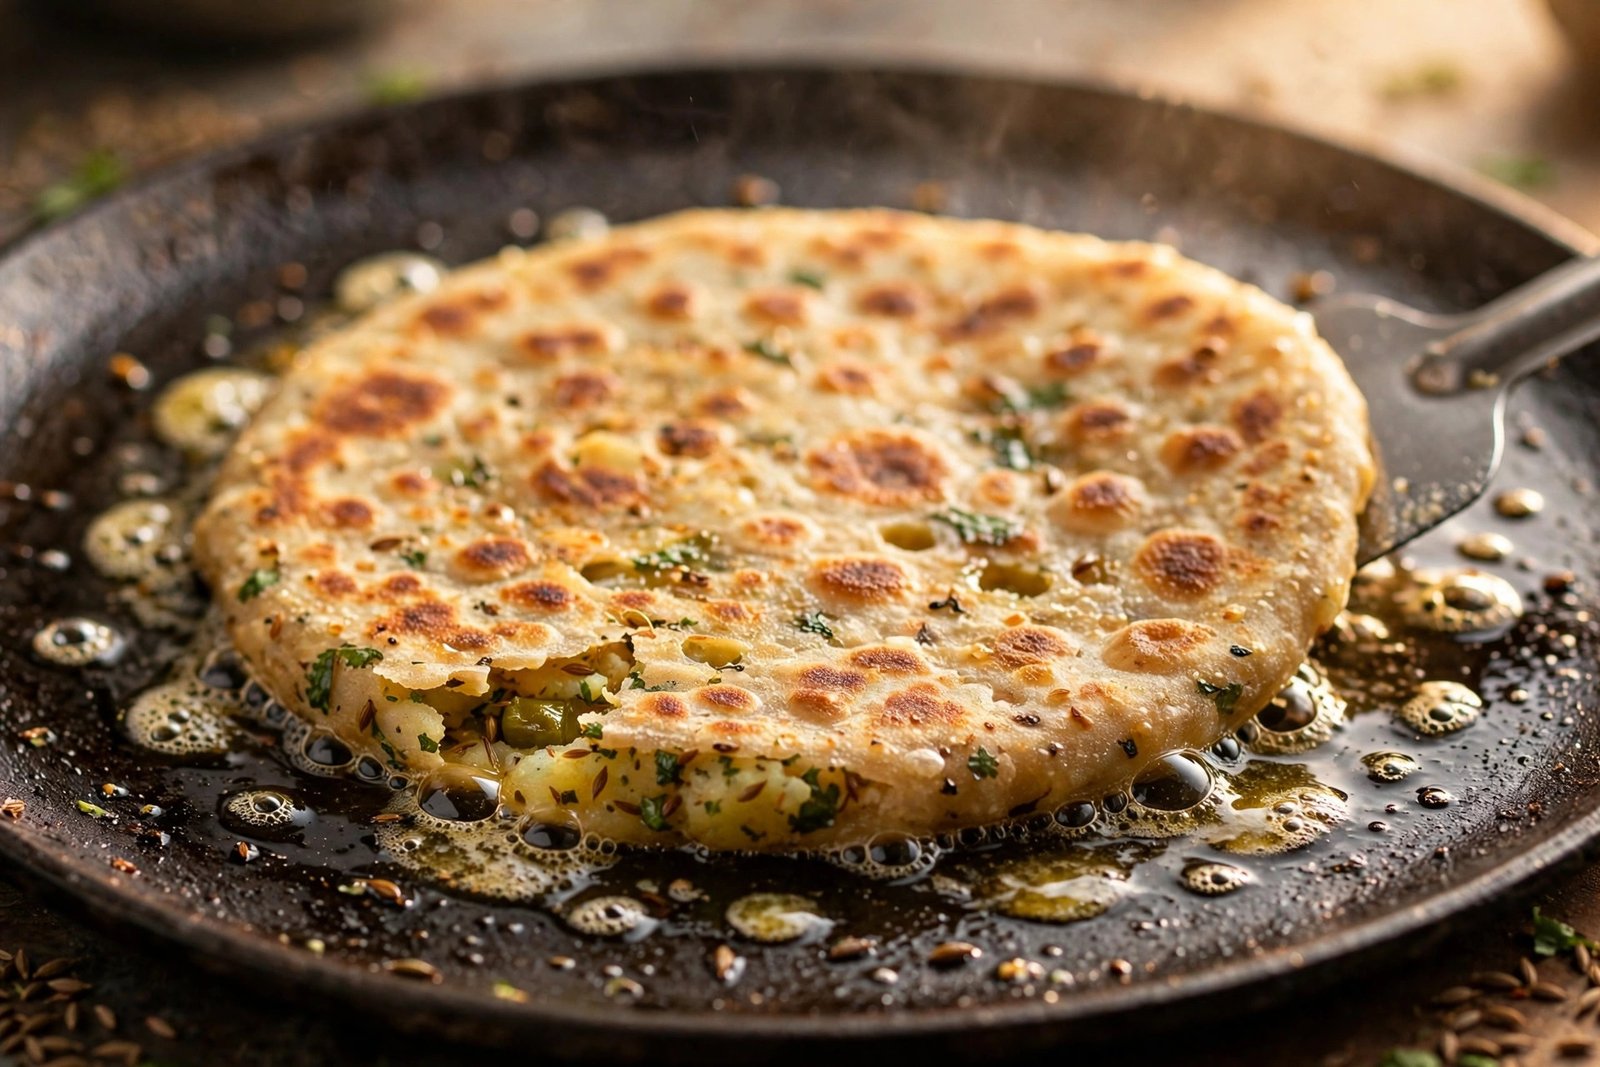
- Flip, add ghee, and press. Brush or drizzle about a teaspoon of ghee over the top surface, flip again, and brush the other side too. Now cook 1–2 minutes per side, pressing gently around the edges with the spatula so every part touches the tawa. The paratha will puff in places and develop deep golden-brown blistered spots — that is exactly what you want.
- Finish and keep warm. Transfer each finished paratha to a plate lined with a clean kitchen towel, and optionally smear the top with a little extra ghee or a knob of white butter while it is still steaming. Cover the stack loosely with the towel as you work through the batch so they stay soft and warm. Repeat rolling and roasting with the remaining stuffed balls.
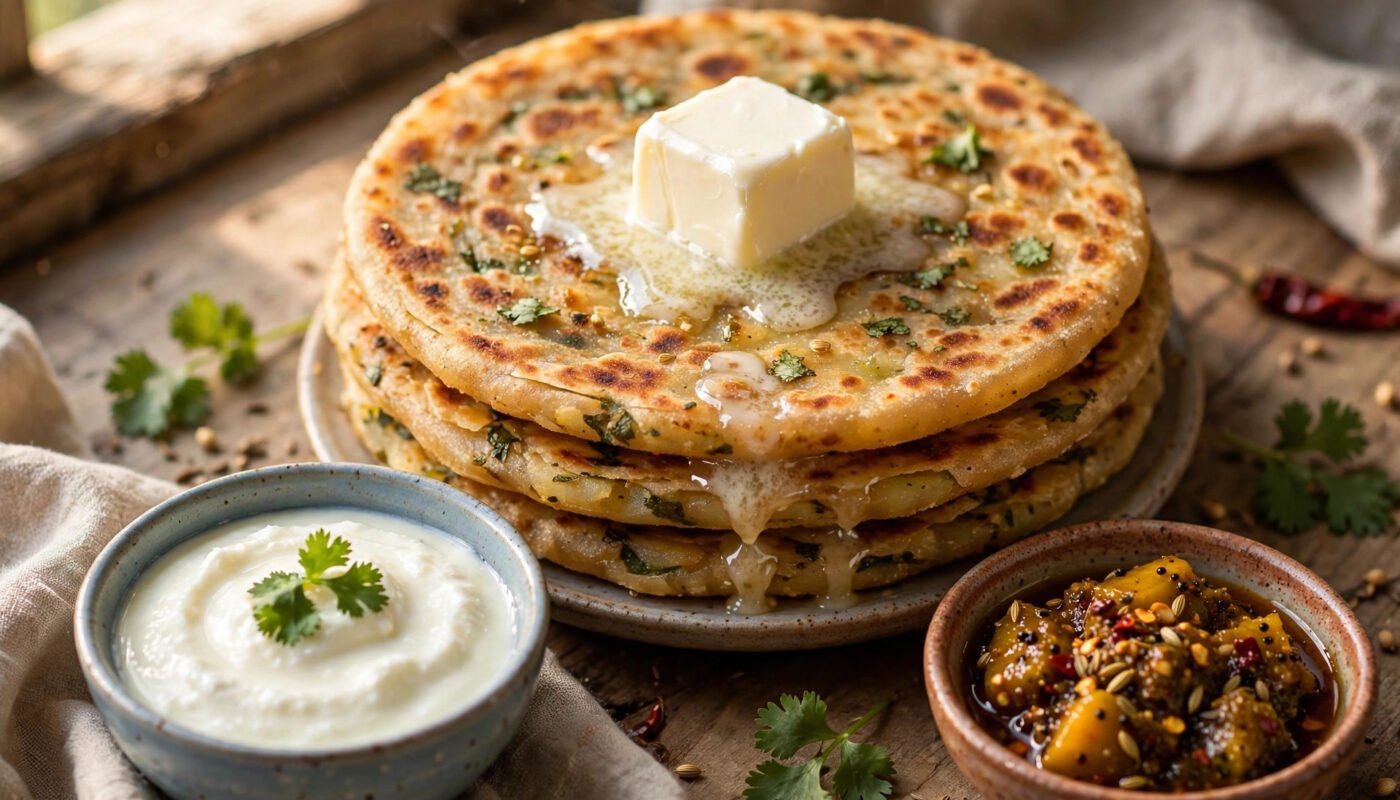
- Serve immediately, the Punjabi way. Aloo parathas wait for no one — serve them piping hot with cold dahi, a spoon of mango or mixed pickle, and a generous dollop of white butter (makkhan) melting on top. A glass of sweet lassi or a cup of strong chai alongside makes it a complete, deeply satisfying breakfast.
Tip: Read through the full post below for step-by-step photos, pro tips, variations and FAQs before you start cooking.
The Story Behind Aloo Paratha
In Punjab, breakfast is not a hurried bowl of cereal eaten over the sink. It is an event. Long before the sun climbs high, the dhabas along the Grand Trunk Road are already awake — tandoors glowing orange, steel plates clattering, and the air thick with the unmistakable perfume of ghee hitting a screaming-hot tawa. Truck drivers pull over, families on road trips pile out of cars, and everyone orders the same thing: a stack of aloo parathas, blistered and golden, with a knob of white butter melting into a glossy pool on top.
The paratha itself is ancient. Its name comes from parat (layers) and atta (flour), and layered flatbreads have been rolled out on Indian chaklas for centuries. But the stuffed paratha — a disc of dough wrapped around a heart of spiced filling — is Punjab’s particular genius. It turned a simple flatbread into a complete meal: carbohydrate, vegetable, spice and fat, all in one hand-held package that a farmer could carry into the fields at dawn and feel full until well past noon. Aloo, the humble potato, became the most beloved filling of all, because it was cheap, filling, and took to spices like it was born for them.
What makes a great aloo paratha special is contrast. The outside should be crisp in patches, with deep golden-brown spots where the dough kissed the hot tawa, and edges that shatter just slightly when you tear them. The inside should be soft and steamy, the potato filling fluffy rather than gluey, warm with ginger and green chilli, tangy with amchur, and humming with the faint thyme-like perfume of ajwain. Eaten the Punjabi way — torn, not cut, scooped through cold creamy dahi, chased with a fiery bite of mango pickle, and washed down with a tall glass of lassi or cutting chai — it is one of the great breakfasts of the world. This recipe teaches you the home-kitchen version, including the no-tear rolling technique that separates triumphant parathas from leaky, frustrating ones.
Why You’ll Love This Recipe
- Truly no-tear technique: the cup-and-seal method keeps the stuffing locked inside while you roll.
- Crisp outside, fluffy inside: roasted on a hot tawa with ghee for those signature golden blisters.
- Perfectly spiced filling: ginger, green chilli, ajwain and amchur in exactly the right balance — never bland, never overpowering.
- Wholesome whole wheat: made with 100% atta, no refined flour, so it eats like a real meal.
- Freezer-friendly: the dough and the filling both prep ahead beautifully for busy mornings.
- A complete breakfast: serve with dahi, pickle and butter and you need nothing else on the plate.
Key Ingredients Explained
Whole wheat atta — and a soft dough: The foundation of every good stuffed paratha is dough that is noticeably softer than everyday roti dough. Soft, pliable dough stretches around the filling instead of fighting it, which is the single biggest reason parathas tear. Use fine, fresh whole wheat atta — the kind labelled “chakki fresh” — because older flour absorbs water unevenly and makes a stiff dough. Knead it for a good five minutes until it is smooth and springy, then rest it covered for 20 to 30 minutes so the gluten relaxes. If you are used to firm roti dough, deliberately add a spoon or two more water than feels right; the dough should yield easily when you poke it.
Potatoes — dryness is everything: The filling lives or dies on moisture control. Boil the potatoes whole and unpeeled in well-salted water until just tender, then drain them completely and let them steam-dry in the colander for ten minutes. Better still, boil them a few hours ahead or the night before and refrigerate them — cold potatoes mash fluffy instead of gummy. Choose floury, starchy potatoes rather than waxy salad potatoes, and never, ever mash them while wet or steaming hot in a sealed bowl, because trapped steam turns the filling to paste and paste leaks through dough. Grate the cooled potatoes on the large holes of a box grater instead of mashing for the most even, lump-free texture.
Ajwain (carom seeds): These tiny, ridged seeds taste like a cross between thyme and oregano with a peppery bite, and they are the signature seasoning of Punjabi parathas. Lightly crush them between your palms before adding so their essential oils wake up. Beyond flavour, ajwain is traditionally prized as a digestive — a thoughtful addition to a rich, ghee-roasted breakfast.
Amchur or anardana — the sour note: Plain mashed potato is bland; it needs acidity to come alive. Amchur (dry mango powder) gives a clean, fruity tang that dissolves invisibly into the filling. Anardana (dried pomegranate seeds), coarsely crushed, gives a deeper, wine-like sourness with little bursts of texture — this is the more traditional dhaba choice. Use one or the other, not both, and taste as you go.
Ginger and green chilli: Freshly grated ginger brings warmth and a gentle heat that dried ginger can never match, while finely chopped green chillies give bright, fresh fire. Grate the ginger on a fine grater so no fibrous strands poke through the dough. Adjust the chillies to your household — two is a happy medium that most people enjoy.
Ghee versus oil for roasting: You can roast parathas in any neutral oil, but ghee is what makes them taste like the dhaba version: nutty, rich, and deeply golden. Ghee’s high smoke point handles the hot tawa without burning, and brushing it on generously is what creates those crisp, blistered spots. If you keep dairy out, use a neutral oil with a high smoke point and add a tiny drizzle of toasted sesame oil at the end for nuttiness. Either way, do not be shy — a dry-roasted paratha is a sad paratha.
Equipment You’ll Need
- Large mixing bowl for kneading the dough
- Rolling pin (belan) and flat rolling board (chakla) — a clean countertop works too
- Heavy tawa or cast-iron skillet, well seasoned
- Flat spatula or pair of tongs for flipping
- Box grater for the potatoes and ginger
- Small bowl of dry flour for dusting, and a damp kitchen towel to cover the dough
- 2 cups whole wheat flour (atta, 240g), plus extra for dusting
- 3/4 cup warm water (180ml), plus a tablespoon or two more as needed
- 1 tsp neutral oil or melted ghee, for the dough
- 3/4 tsp fine salt, for the dough
- 4 medium potatoes (about 500g), boiled whole, cooled and grated
- 1-inch piece fresh ginger (about 15g), finely grated
- 2 green chillies, finely chopped (adjust to taste)
- 1/2 cup fresh coriander leaves, finely chopped (a generous handful)
- 1 tsp ajwain (carom seeds), lightly crushed between the palms
- 1 tsp amchur (dry mango powder) or 1 tbsp coarsely crushed anardana
- 1 tsp roasted cumin powder
- 1/2 tsp garam masala
- 1/2 tsp red chilli powder (optional, for extra heat)
- 3/4 tsp fine salt for the filling, or to taste
- Ghee or oil, as needed for roasting (about 3–4 tbsp total)
- Boil the potatoes right. Scrub the potatoes and boil them whole and unpeeled in generously salted water until a knife slides in with no resistance, about 20–25 minutes. Drain them thoroughly and leave them in the colander for at least 10 minutes so surface steam escapes — this drying step is what keeps the filling fluffy instead of gluey. For the very best texture, do this step a few hours ahead or the night before and refrigerate the potatoes; cold, rested potatoes grate into perfect dry shreds.
- Make a soft, pliable dough. In a large bowl, combine the atta and salt, then drizzle in the oil or ghee. Add the warm water a little at a time, mixing with your hand until a shaggy mass forms, then knead firmly for 5 minutes until smooth, soft and slightly tacky — softer than your usual roti dough. Cover with a damp towel and rest for 20–30 minutes; this relaxes the gluten so the dough will stretch around the filling instead of springing back and tearing.
- Mix a dry, well-seasoned filling. Peel the cooled potatoes and grate them on the large holes of a box grater into a wide bowl. Add the ginger, green chillies, coriander, crushed ajwain, amchur, cumin, garam masala, red chilli powder if using, and salt. Mix gently with a fork or your fingertips — never mash aggressively or overwork it, which releases starch and turns it sticky. Taste and adjust: it should be boldly seasoned, a touch saltier and tangier than you think, because the plain dough will mute it.
- Portion dough and filling evenly. Divide the rested dough into 8 equal balls and the filling into 8 equal portions — eyeballing this is the most common cause of blowouts, because an oversized lump of filling cannot be sealed. Keep the dough balls covered under the damp towel so they do not dry out, and work with one at a time.
- Fill and seal using the cup method. Flatten one dough ball into a thick disc about 3 inches across, keeping the centre slightly thicker than the edges. Cup it in your palm, place a portion of filling in the hollow, then gather the edges up and over the filling like a little money bag. Pinch the gathered dough firmly to seal, twist off any excess, and press the sealed side down. A tight seal with no trapped air pockets is the secret to tear-free rolling.
- Roll gently and evenly. Dust the stuffed ball lightly with dry flour and roll from the centre outward, rotating a quarter turn between strokes, to a circle about 6–7 inches across and just under 1/4 inch thick. Use light, even pressure — let the weight of the pin do the work. If a tiny tear appears, dab it with a pinch of dry flour and keep going; small patches seal themselves on the hot tawa. Roll each paratha just before it hits the tawa rather than stacking raw ones.
- Heat the tawa properly. Set your tawa or cast-iron skillet over medium-high heat for 3–4 minutes until a sprinkling of flour sizzles and browns within seconds. The tawa must be properly hot before the first paratha lands — too cool and the paratha dries out before it colours; too fierce and the outside chars while the inside stays raw.
- Roast the first side. Lay the rolled paratha on the hot tawa and cook for 45–60 seconds until you see small bubbles and the underside has pale, dry patches. Flip it with a spatula — this first flip should happen before any browning, which keeps the paratha soft and lets steam start building inside.
- Flip, add ghee, and press. Brush or drizzle about a teaspoon of ghee over the top surface, flip again, and brush the other side too. Now cook 1–2 minutes per side, pressing gently around the edges with the spatula so every part touches the tawa. The paratha will puff in places and develop deep golden-brown blistered spots — that is exactly what you want.
- Finish and keep warm. Transfer each finished paratha to a plate lined with a clean kitchen towel, and optionally smear the top with a little extra ghee or a knob of white butter while it is still steaming. Cover the stack loosely with the towel as you work through the batch so they stay soft and warm. Repeat rolling and roasting with the remaining stuffed balls.
- Serve immediately, the Punjabi way. Aloo parathas wait for no one — serve them piping hot with cold dahi, a spoon of mango or mixed pickle, and a generous dollop of white butter (makkhan) melting on top. A glass of sweet lassi or a cup of strong chai alongside makes it a complete, deeply satisfying breakfast.
Pro Tips for Perfect Results
- Chill your potatoes: potatoes boiled the night before and refrigerated are dramatically easier to work with — cold starch firms up and grates into dry, separate shreds instead of sticky mash.
- Keep the dough softer than you think: if your parathas crack while rolling, the dough is too stiff. Next time add an extra tablespoon or two of water and rest it longer.
- Never overstuff: the filling ball should be roughly the same size as the dough ball. More filling feels generous but is the number one cause of tears.
- Expel air when sealing: press the filling down into the cup and squeeze out air pockets as you gather the dough — trapped air expands on the hot tawa and bursts through.
- Dust lightly, not heavily: too much dry flour on the surface burns on the tawa and tastes raw. Shake off the excess before the paratha hits the heat.
- Control the tawa temperature: if parathas are browning in under a minute per side, lower the heat slightly; if they sit pale and leathery, it is too cool. Medium-high with tiny adjustments is the sweet spot.
- Roll from the centre out: this keeps the edges from getting paper-thin while the middle stays thick, which gives you even cooking and an even distribution of filling in every bite.
Variations to Try
Once you have mastered the seal-and-roll technique, an entire family of stuffed parathas opens up. Gobi paratha swaps the potato for finely grated cauliflower that has been salted, rested for 15 minutes, and squeezed completely dry — the squeezing step is non-negotiable, since cauliflower holds far more water than potato. Paneer paratha uses crumbled fresh paneer seasoned the same way, with a little extra amchur to cut the richness; it is softer and more delicate, so roll with an even lighter hand. Mooli paratha, the winter favourite, follows the gobi method: grate white radish, salt, rest, and wring out every drop of liquid before seasoning with ajwain and green chilli.
For something indulgent, try a cheese-stuffed version: mix grated mozzarella or a sharp processed cheese into the potato filling and add a pinch of black pepper — the molten centre is wildly popular with kids. And if you want the true dhaba experience, make them Amritsari style: roll the parathas slightly thicker, roast them generously in ghee until deeply crisp, and serve with a dollop of white butter, imli chutney, and sliced onions on the side. Purists will tell you Amritsari parathas belong in a tandoor, but a ripping-hot tawa gets you remarkably close at home.
Serving Suggestions
The classic Punjabi plate is beautifully simple: two hot aloo parathas with a knob of white butter (makkhan) melting over the top, a bowl of thick cold dahi (plain curd) for cooling contrast, and a spoonful of mango or mixed pickle for sharp, fiery relief. Sliced raw onions and a wedge of lemon on the side add crunch and brightness. To drink, nothing beats a tall glass of sweet or salted lassi — its cool creaminess is the perfect foil for the spiced, ghee-crisped paratha — though a strong cup of adrak chai runs a close second on cold mornings. If you are serving a crowd, set everything out family-style and let people assemble their own bites; parathas are at their best within minutes of leaving the tawa, so keep the stack covered and the accompaniments ready before you start roasting.
Storage and Reheating
Cooked aloo parathas keep well: cool them completely, stack with squares of parchment between each one, and refrigerate in an airtight container for up to 3 days. Reheat directly on a hot tawa for a minute per side with the tiniest brush of ghee — they crisp back up beautifully, far better than a microwave, which makes them rubbery. For longer storage, freeze the stack (with parchment separators) in a zip-lock bag for up to 2 months; thaw at room temperature for 20 minutes, then reheat on the tawa. You can also freeze uncooked stuffed parathas: roll them, separate with parchment, freeze solid, and cook straight from frozen, adding an extra minute per side. Leftover filling keeps 2 days refrigerated in a sealed box — it makes an excellent sandwich stuffing or a quick filling for bread pakoras the next day.
Frequently Asked Questions
Why do my parathas tear while rolling?
Almost always one of three culprits: dough that is too stiff, filling that is too wet, or overstuffing. Make the dough deliberately soft, dry your potatoes thoroughly (boil them ahead and refrigerate), and keep the filling ball no bigger than the dough ball. Seal out air pockets and roll with light, even pressure from the centre outward.
Can I make the dough or filling ahead of time?
Yes — both, in fact. The dough can be kneaded, covered tightly, and refrigerated for up to 24 hours; bring it to room temperature for 20 minutes before rolling. The filling keeps 2 days refrigerated. Do not stuff the parathas hours ahead, though — the salt in the filling draws out moisture over time and the raw stuffed discs will turn soggy.
Can I use leftover aloo sabzi as the filling?
You can, with one adjustment: leftover sabzi is usually too moist and too chunky. Mash it very well, and if it looks wet, cook it down in a dry pan for a few minutes to evaporate the excess liquid, then cool completely before stuffing. Boost the seasoning with a little extra amchur and ajwain, since sabzi is seasoned for eating with roti, not for being wrapped inside one.
Is it okay to use oil instead of ghee?
Absolutely. The parathas will still be crisp and delicious roasted in any neutral, high-smoke-point oil. Ghee adds a nutty richness that is traditional and hard to beat, but a dairy-free household loses nothing essential by using oil — just be generous with it, because a dry-roasted paratha never gets those golden blistered spots.
Can I make aloo parathas without a tawa?
Yes. A heavy cast-iron skillet or any thick-bottomed frying pan works well — the key is even, retained heat. Avoid thin non-stick pans if you can, because they create hot spots that scorch one area while the rest stays pale. Whatever you use, preheat it thoroughly and keep the heat at medium-high.
How do I keep parathas soft after cooking?
Stack them immediately on a plate lined with a clean kitchen towel and cover the stack loosely — the trapped steam keeps them supple. Smearing a whisper of ghee or butter on each hot paratha also locks in softness. Serve within 20–30 minutes for the best texture; they firm up as they cool, though a quick tawa reheat revives them.
Aloo paratha is more than a recipe — it is a warm stack of comfort, a taste of Punjabi mornings, and proof that the humblest ingredients become extraordinary with a little technique and a generous hand with the ghee. Roll your first batch this weekend, gather everyone around the table while they are still steaming, and do not be surprised when the plate empties faster than you can roast the next one. Once this becomes your Sunday ritual, breakfast will never feel ordinary again.