Recipe Card
Watch humble whole wheat dough turn into a spiralled, shatteringly flaky laccha paratha with visible layers. This step-by-step recipe teaches the pleating and coiling technique for crisp, ghee-brushed layers at home.
Ingredients
- 2 cups whole wheat flour (atta, 240g), plus extra for dusting
- 3/4 cup warm water (180ml), plus 1–2 tbsp more as needed
- 1/4 cup warm milk (60ml), optional, for extra tenderness
- 3/4 tsp fine salt
- 1 tsp sugar, optional, for better browning
- 1 tbsp oil or melted ghee, for kneading into the dough
- 1/3 cup melted ghee (80ml), for layering and roasting
Instructions
- Mix and knead a soft dough. In a large bowl, combine the atta, salt and sugar. Pour in the warm water and milk, mixing with your hand until a shaggy mass forms. Add the tablespoon of oil or ghee and knead firmly for 6 to 8 minutes, pushing the dough away with the heel of your hand and folding it back, until it is completely smooth, soft and slightly tacky — noticeably softer than roti dough. If it feels stiff, sprinkle in warm water a teaspoon at a time; if sticky, dust with a little atta. Cover with a damp kitchen towel and rest for at least 30 minutes at room temperature. This rest is non-negotiable: it relaxes the gluten so the dough rolls thin without fighting you.
- Divide and pre-shape. Knead the rested dough briefly for 30 seconds until silky. Divide into 8 equal portions and roll each into a smooth ball with no cracks, tucking the seams underneath. Keep the balls covered with the damp towel so they never dry out — even a thin dry skin will cause tearing later. Work with one ball at a time.
- Roll it paper-thin. Dust a ball lightly with dry atta and roll it into a circle about 10 to 11 inches across — as thin as you possibly can without tearing. You should be able to faintly see the countertop through the dough in places. If the dough resists and springs back, stop, cover it and let it rest 5 minutes; fighting springy dough tears it. Thinness here directly equals flakiness later, so take your time.
- Fat it and flour it. Brush the entire surface generously with melted ghee, edge to edge — about 2 teaspoons per paratha. Then dust a light, even snowfall of dry atta over the ghee. This ghee-plus-flour sandwich is what keeps every fold separate, so do not skip the flour dusting. It should look like a light frost, not a coating.
- Pleat into an accordion. Starting from the edge nearest you, fold the thin sheet into narrow pleats about 1 inch wide, the way you would fold a paper fan, lifting and folding the dough back and forth across the whole circle. Work gently — the dough is thin and the ghee makes it slippery, but the pleats do not need to be perfect. You will end up with a long pleated rope.
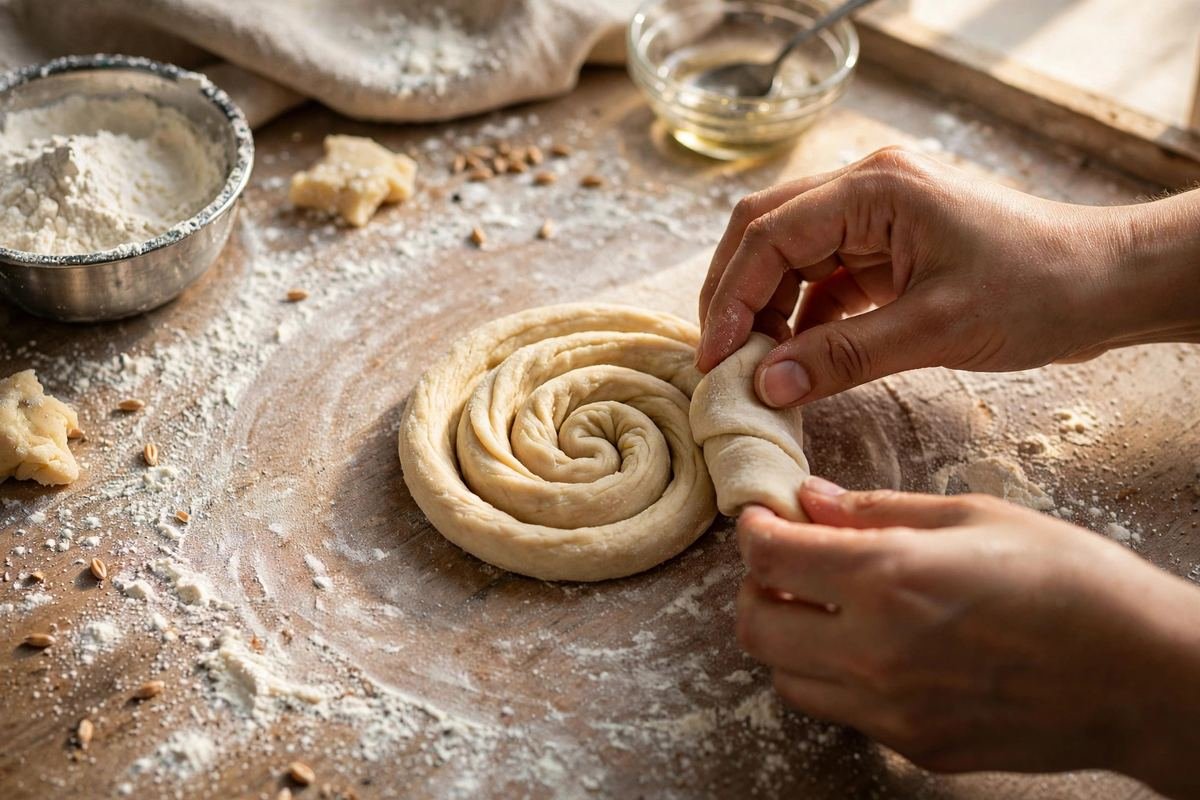
- Coil into a spiral. Take one end of the pleated rope and wind it into a tight spiral, like a cinnamon roll or a coiled rope, tucking the loose end underneath and pressing it into the centre to seal. You now have a flat-ish disc with all the pleats radiating from the centre — this is the laccha structure. Repeat with the remaining dough balls, keeping the finished coils covered.
Tip: Read through the full post below for step-by-step photos, pro tips, variations and FAQs before you start cooking.
The Story Behind Laccha Paratha
Some breads are food; a laccha paratha is theatre. Sit at any highway dhaba in Punjab and you will see the show: a cook slaps a thin sheet of dough onto the counter, fans it into ripples with the edge of his hand, coils it into a neat spiral like a sleeping snail, and flattens it with two thumps of the rolling pin. Onto the roaring tawa it goes, ghee hissing around the edges, and when it comes off he does the best part — he crushes the hot paratha between his palms with a sharp crunch, and the whole thing blooms open into a dozen crisp, separate rings. That crunch, that fanning open of layers, is the entire point of this bread.
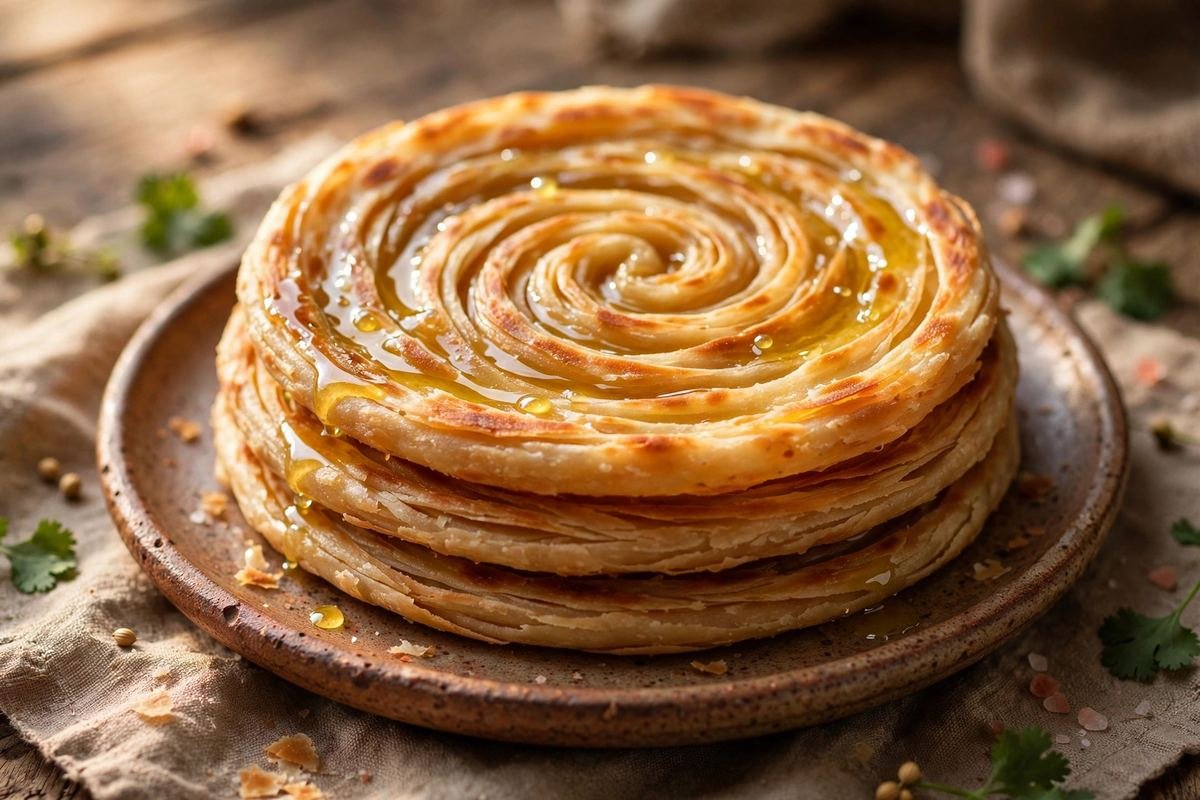
The name tells you what to look for. Laccha means rings or coils — the same word used for the stacked bangles worn on the wrist — and a proper laccha paratha should look like those bangles from the side: distinct, flaky circles of golden dough separated by whisper-thin gaps where steam and ghee did their work. It is the North Indian cousin of the Malabar parotta, made with whole wheat atta instead of refined maida, and it sits somewhere between everyday roti and festival bread. Dhabas serve it with dal makhani, paneer butter masala and rajma, where its crisp layers are perfect for scooping up thick gravies. At home it turns an ordinary weeknight dal into a small celebration.
What makes this bread special is not a secret ingredient — it is pure technique. The layers come from three moves: rolling the dough paper-thin, spreading it with fat and a dusting of dry flour so the sheets refuse to stick together, and then pleating it into an accordion and coiling it into a spiral so the thin sheet folds back on itself again and again. Roast it hot and fast, crush it the moment it leaves the tawa, and those folds separate into flakes. This recipe walks you through every one of those moves with the visual cues to know you are doing them right. Your first paratha may be a little lopsided; by the third, you will be fanning layers like the dhaba cook.
Why You’ll Love This Recipe
- Real, visible layers: the pleat-and-coil method gives you the signature flaky rings, not just a flat paratha with a fancy name.
- 100% whole wheat: made with atta, so it is wholesome enough for everyday meals but special enough for guests.
- Crisp outside, soft inside: roasted in ghee until the edges shatter while the centre stays tender and steamy.
- No yeast, no oven: just dough, a rolling pin and a hot tawa — the whole thing happens on your stovetop.
- The satisfying crush: that final squeeze between your palms is pure joy, and it is what opens the layers up.
- Perfect gravy scoop: sturdy, flaky and rich, built for dal makhani, chole and paneer curries.
- Make-ahead friendly: the coiled dough discs rest beautifully in the fridge until you are ready to roll.
Key Ingredients Explained
Whole wheat atta — fresh and fine: Laccha paratha is traditionally a maida bread in some regions, but the atta version is the beloved home-style one, nuttier and more wholesome. Use fresh, finely milled whole wheat atta, because old or coarse flour makes a dough that resists rolling thin — and thin is everything here. The dough needs to be soft and very pliable, softer than everyday roti dough, so it can be stretched nearly translucent without springing back or tearing. Knead it well for six to eight minutes to develop the gluten that gives the layers their chew, then rest it for at least 30 minutes so it relaxes completely.
Ghee — the layering fat: Ghee does two jobs in this recipe: brushed between the pleats it keeps the layers separate so they flake apart, and on the tawa it fries the surface to a crisp, nutty gold. Use melted ghee for the layering step so it spreads in a thin, even film — soft but not solid ghee works too, but melted is easier to control. If you are cooking dairy-free, a neutral oil with a high smoke point does the layering job fine, though you will miss ghee’s toasty flavour. Be generous: a stingy hand with fat is the most common reason laccha parathas come out bready instead of flaky.
Dry flour — the unsung hero: After spreading ghee over the thin sheet, you dust it lightly with dry atta before pleating. This is the trick that guarantees separation: the flour acts like tiny ball bearings between the folds so steam can push them apart during roasting. Skip it and the layers weld themselves together. Just a light snowfall is enough — too much and the paratha tastes dusty.
A pinch of sugar and salt: Salt seasons the dough from within, which matters because there is no filling to carry flavour here. The small spoon of sugar is optional but traditional in many dhaba recipes: it feeds browning on the tawa, giving you deeper golden spots and a faint caramel note at the crisp edges. It does not make the paratha sweet.
Warm water (or milk): Kneading with warm water relaxes the gluten from the start and gives a softer, more extensible dough. Some cooks replace a quarter of the water with warm milk for extra tenderness and a richer crumb — lovely if you are serving the parathas with a mild curry, though purists stick to water for maximum crispness.
Equipment You’ll Need
- Large mixing bowl for kneading
- Rolling pin (belan) and a large flat surface or chakla
- Heavy tawa or cast-iron skillet — it must hold fierce, even heat
- Flat spatula or tongs for flipping
- Small bowl of melted ghee with a pastry brush or spoon
- Small bowl of dry atta for dusting, and a clean kitchen towel to cover the dough
- 2 cups whole wheat flour (atta, 240g), plus extra for dusting
- 3/4 cup warm water (180ml), plus 1–2 tbsp more as needed
- 1/4 cup warm milk (60ml), optional, for extra tenderness
- 3/4 tsp fine salt
- 1 tsp sugar, optional, for better browning
- 1 tbsp oil or melted ghee, for kneading into the dough
- 1/3 cup melted ghee (80ml), for layering and roasting
- Mix and knead a soft dough. In a large bowl, combine the atta, salt and sugar. Pour in the warm water and milk, mixing with your hand until a shaggy mass forms. Add the tablespoon of oil or ghee and knead firmly for 6 to 8 minutes, pushing the dough away with the heel of your hand and folding it back, until it is completely smooth, soft and slightly tacky — noticeably softer than roti dough. If it feels stiff, sprinkle in warm water a teaspoon at a time; if sticky, dust with a little atta. Cover with a damp kitchen towel and rest for at least 30 minutes at room temperature. This rest is non-negotiable: it relaxes the gluten so the dough rolls thin without fighting you.
- Divide and pre-shape. Knead the rested dough briefly for 30 seconds until silky. Divide into 8 equal portions and roll each into a smooth ball with no cracks, tucking the seams underneath. Keep the balls covered with the damp towel so they never dry out — even a thin dry skin will cause tearing later. Work with one ball at a time.
- Roll it paper-thin. Dust a ball lightly with dry atta and roll it into a circle about 10 to 11 inches across — as thin as you possibly can without tearing. You should be able to faintly see the countertop through the dough in places. If the dough resists and springs back, stop, cover it and let it rest 5 minutes; fighting springy dough tears it. Thinness here directly equals flakiness later, so take your time.
- Fat it and flour it. Brush the entire surface generously with melted ghee, edge to edge — about 2 teaspoons per paratha. Then dust a light, even snowfall of dry atta over the ghee. This ghee-plus-flour sandwich is what keeps every fold separate, so do not skip the flour dusting. It should look like a light frost, not a coating.
- Pleat into an accordion. Starting from the edge nearest you, fold the thin sheet into narrow pleats about 1 inch wide, the way you would fold a paper fan, lifting and folding the dough back and forth across the whole circle. Work gently — the dough is thin and the ghee makes it slippery, but the pleats do not need to be perfect. You will end up with a long pleated rope.
- Coil into a spiral. Take one end of the pleated rope and wind it into a tight spiral, like a cinnamon roll or a coiled rope, tucking the loose end underneath and pressing it into the centre to seal. You now have a flat-ish disc with all the pleats radiating from the centre — this is the laccha structure. Repeat with the remaining dough balls, keeping the finished coils covered.
- Rest the coils, then roll gently. Let the coiled discs rest under the damp towel for 10 minutes — this relaxes them so they roll out evenly. Then, pressing straight down (never at an angle), roll each coil into a 7 to 8-inch disc, about 1/4 inch thick. Roll lightly and evenly; pressing too hard squeezes the layers together and undoes all your pleating work. You should see faint spiral rings on the surface — that is the laccha peeking through, and it means you are on track.
- Roast hot and fast. Heat your tawa over medium-high heat until a drop of water dances and evaporates within 2 seconds — the tawa should be properly hot, around 220–230°C. Lay a paratha on it and cook for 30 to 40 seconds until you see small bubbles and pale spots forming on the underside. Flip, and immediately brush or drizzle about a teaspoon of ghee around the edges and over the surface. Cook 45 to 60 seconds, pressing gently with the spatula at the edges so the whole paratha makes contact, until deep golden-brown blisters appear. Flip once more, add another teaspoon of ghee, and roast 30 to 45 seconds more. The paratha is done when both sides are golden with darker crisp spots, the edges look dry and flaky, and it feels light and puffed rather than dense. Total roasting time is about 2 minutes per paratha.
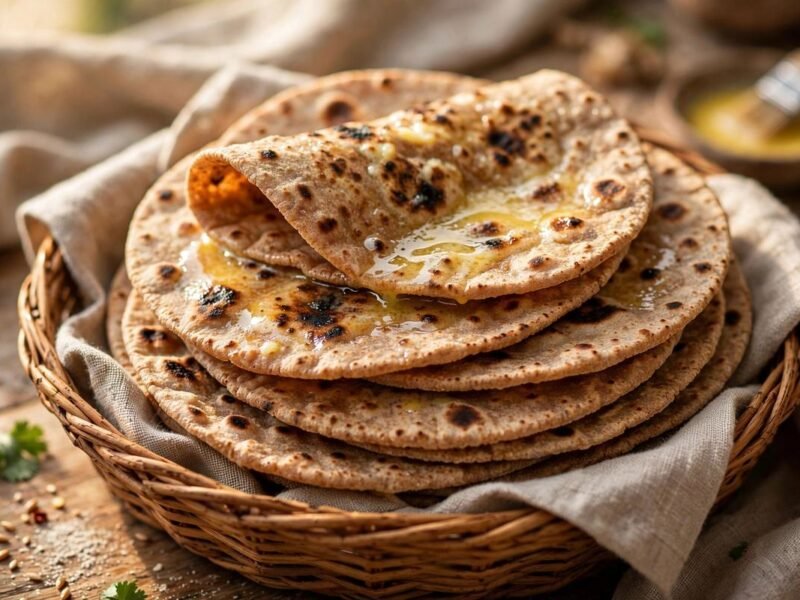
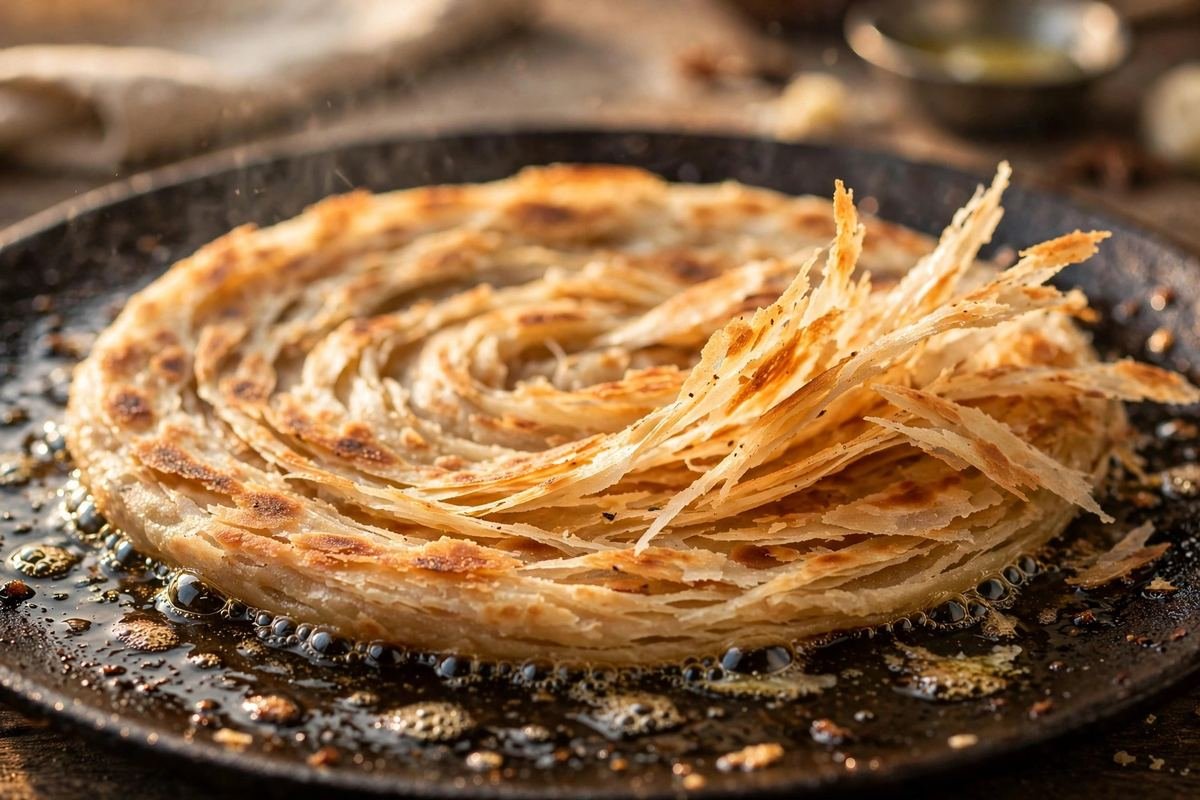
- Crush to open the layers. This is the signature move, and it must happen while the paratha is steaming hot. Transfer it to a plate or straight into a roti basket lined with a cloth, and immediately scrunch it lightly between your palms — gather the edges toward the centre and give a gentle crush, then rotate and crush once more. You will hear a faint crackle and see the spiral rings fan apart into distinct flaky layers. Do not flatten it back down; let it sit slightly rumpled so the layers stay separated. Serve immediately — laccha paratha waits for no one.
- Repeat and stack. Continue with the remaining coils, keeping finished parathas stacked in the cloth-lined basket so they stay warm and the trapped steam keeps them supple. If you are cooking for a crowd, you can roll all the discs first and roast in quick succession — the roasting itself takes only 2 minutes each, so the rhythm settles in fast.
Pro Tips for Perfect Results
- Softer dough, flakier paratha. If your layers are not separating, the dough was almost certainly too firm. Next time, add water until the dough yields easily to a poke — soft dough stretches thin and lets steam do its separating work.
- Do not skip the flour dusting. The ghee alone is not enough; it is the dry atta dusted over the ghee that truly stops the folds from fusing. A light snowfall, evenly spread, every single time.
- Roll thin, then roll thick. The first roll (before pleating) should be as thin as possible; the second roll (after coiling) should be gentle and stop at 1/4 inch. Heavy rolling after coiling crushes the layers flat.
- Keep the tawa hot enough. A lukewarm tawa steams the paratha instead of searing it, giving you a soft, bready result with no crisp spots. Test with water — it should sizzle and vanish in 2 seconds. Adjust between medium and medium-high as you go.
- Crush while hot, every time. The layers only separate while the ghee between them is molten and the steam is active. A paratha crushed after cooling just bends; one crushed fresh off the tawa blooms open.
- Ghee on the tawa, not just in the layers. The layering ghee gives flavour and separation, but the ghee added during roasting is what fries the surface crisp. Both matter — do not economise on the second.
- Rest the coils before the final roll. Ten minutes of rest after coiling lets the gluten relax so the discs roll out evenly without springing back into thick centres and thin edges.
- Fixing tears: if the thin sheet tears during pleating, do not start over — just pinch the tear closed, dust with flour and carry on. Small tears vanish into the coil and never show in the finished paratha.
Variations to Try
Pudina laccha paratha: scatter 2 tablespoons of finely chopped fresh mint over the ghee-brushed sheet before pleating, for a fragrant green-flecked paratha that pairs beautifully with raita.
Garlic laccha paratha: mix 4 finely minced garlic cloves into the layering ghee. The garlic toasts between the folds as the paratha roasts, giving you garlicky, crisp-edged layers — superb with dal tadka.
Whole spices version: sprinkle 1/2 teaspoon of coarsely crushed ajwain or 1 teaspoon of sesame seeds over the ghee before pleating, for little bursts of flavour in the layers.
Chilli-cheese laccha: a modern dhaba favourite — sprinkle finely chopped green chillies and 3 tablespoons of grated processed cheese over the sheet before pleating. Roll slightly thicker and roast on medium heat so the cheese melts without burning.
Malabar-style parotta: swap half the atta for maida (all-purpose flour) and add 1 tablespoon of sugar to the dough for the flaky, slightly sweet street-style parotta of Kerala, stretched by hand instead of rolled.
Mini cocktail parathas: divide the dough into 16 small balls instead of 8 and follow the same method for bite-sized flaky discs — perfect as a party starter with dips.
Serving Suggestions
Laccha paratha is at its happiest beside a rich, scoopable curry. The classic dhaba plate pairs it with dal makhani or paneer butter masala, where the crisp layers mop up gravy without going soggy. It is equally at home with chole, rajma, baingan bharta, or a simple dal tadka with a spoon of white butter melting on top. For a lighter meal, serve two parathas with boondi raita or mixed veg raita and a sharp lemon pickle — the cool raita against the crisp, ghee-rich layers is a beautiful contrast. Always serve them straight off the tawa if you can; stack them in a cloth-lined basket and bring the whole basket to the table so everyone tears into hot, crackling layers. A tall glass of masala chaas or sweet lassi completes the dhaba experience.
Storage and Reheating
Laccha paratha is emphatically best fresh, but leftovers are far from wasted. Cool completely, then store in an airtight container or zip-lock bag at room temperature for up to 24 hours, or refrigerate for up to 3 days with parchment between the layers so they do not stick. To reheat, warm each paratha directly on a hot tawa for 30 to 45 seconds per side, adding a tiny smear of ghee — the direct heat re-crisps the layers far better than a microwave, which makes them chewy. For longer storage, freeze the uncooked coiled discs: place them on a tray lined with parchment, freeze until solid, then transfer to a freezer bag with parchment between them. They keep for a month; roll and roast straight from frozen, adding an extra 30 seconds on the tawa. Cooked parathas also freeze well for up to a month — reheat from frozen on the tawa with a little ghee and crush once more while hot to wake the layers back up.
Frequently Asked Questions
Why are my layers not separating?
The three usual culprits are: dough rolled too thick before pleating, too little ghee or no flour dusting between the folds, or skipping the hot crush. The flour dusting is the most commonly missed step — without it, the folds fuse during roasting no matter how well you pleated. Also make sure the tawa is genuinely hot; a slow roast steams the layers together instead of searing them apart.
Can I make laccha paratha with oil instead of ghee?
Yes. A neutral oil with a high smoke point works for both the layering and the roasting, and the pleating technique still produces visible layers. You will lose ghee’s nutty, toasty flavour, which is a big part of the dhaba character, so if dairy is the only concern, ghee is often tolerated where butter is not — but oil is a perfectly respectable stand-in.
My paratha tears when I roll it thin. What am I doing wrong?
Almost always, the dough needed more rest or more water. Springy, resistant dough means the gluten is too tight — cover it and rest 10 to 15 minutes, and next time knead a slightly softer dough. Also check that you are not rolling over a dry skin: keep unused dough balls covered with a damp towel at all times.
Can I prepare the dough in advance?
Absolutely. The kneaded dough keeps in an airtight container in the fridge for up to 2 days — bring it to room temperature for 30 minutes before rolling. Even better, coil the pleated discs, separate them with parchment, and refrigerate for up to 24 hours; then just roll and roast. The cold rest actually relaxes the gluten further, making rolling easier.
Is laccha paratha the same as Malabar parotta?
They are close cousins, not twins. Both use the pleat-and-coil technique for flaky layers, but Malabar parotta is made with maida (refined flour), often stretched paper-thin by hand-slamming, and has a softer, chewier, slightly sweet character. Laccha paratha is the whole wheat atta version — nuttier, a touch heartier, and rolled rather than hand-stretched.
How do I keep parathas soft if I am making a big batch?
Stack them in a roti basket or casserole lined with a clean cotton cloth, and fold the cloth over the stack as you go. The trapped steam keeps them supple without making them soggy. Do not stack them uncovered on a plate — the top one dries out and the bottom one steams itself limp.
There is something deeply satisfying about pulling apart a laccha paratha you made yourself — watching those golden rings fan open, hearing that faint crackle, and knowing that a handful of flour, water and ghee turned into this. It takes a little practice, but the technique is honest and repeatable, and every batch gets better. So heat up your tawa, be generous with the ghee, and do not forget the crush. Your dal is waiting.